This post picks up from our discussion last week on the differences between bespoke and made-to-measure clothing – in particular the importance of balance as it pertains to a great fitting garment.
When we talk about balance what we’re essentially discussing is how a jacket or pant hangs on the body. Put simply the goal for any jacket is to have the side seams aligned vertically while the bottom hem of the jacket rests perpendicular. Achieving this seemingly basic goal can sometimes be easier said than done based on the posture a person might have. This is why the skill of reading the body in tailoring is so crucial; information that is then transferred into the pattern and ultimately into a perfectly tailored garment as the end result.
4 keys to perfect balance.
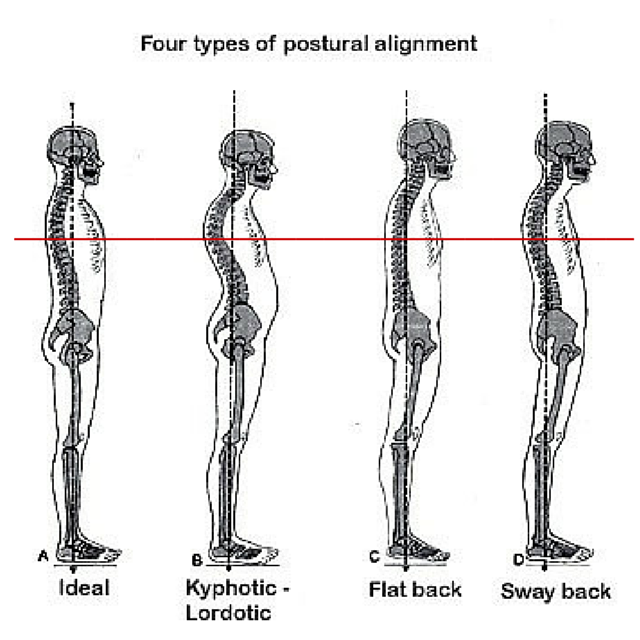
Is there a thing as a perfectly balanced posture? Finding it in the real world is difficult but thankfully we have diagrams like below to show us:
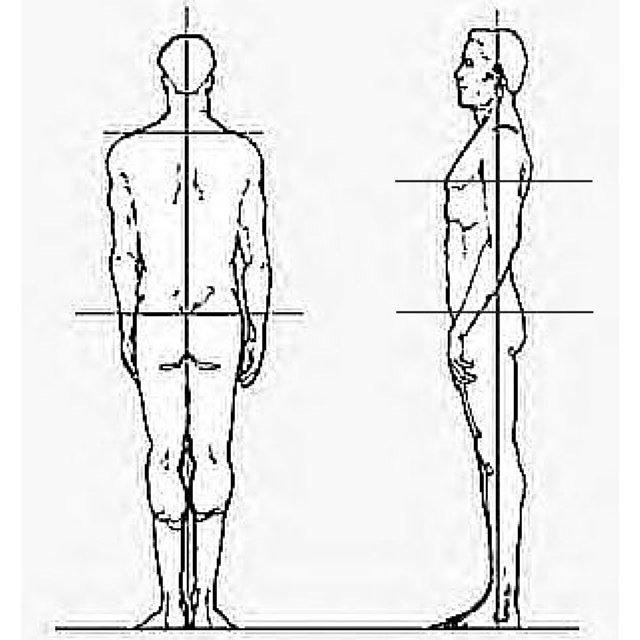
On the left you see a perfect balance between the left and right sides of the body. Key in this is that the shoulders and hips are at the same height on both sides of the body. On the right side of the diagram we see a perfect balance between the front and the back. Notice how we generally carry more of our body mass to the front side of the vertical plane; this is of course offset by the upper back and seat on the back side.
Unfortunately though most of our bodies simply aren’t this balanced and proportional. More often than not we’re twisted to some degree and hold our weight in a forward or backwards angle. The result is that we have to play with the balance of our jackets and pants to make our bodies appear straighter than they are. To achieve this we need to address the four major balance issues.
1. Vertical Balance
When we talk about vertical balance it’s easiest to think about the two main pieces of a jacket – the front (green) and the back (red). They start at the neck point and go down towards the hem the jacket.
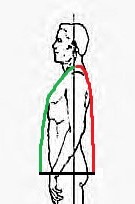
In a balanced pattern like we see above the front is typically 1″ longer than the back. The greater length is due to the fact that it has to go over the chest before going down to the hem; whereas the back has less distance to travel over the blades in the upper back.
Where things start to go wrong for your basic balanced coat is when the posture changes. I’ll explain what happens by using two common postures – an erect and a stoop. As you can see in the diagram below with a stoop the head and shoulders roll forward; whereas with erect posture the head and shoulders shift back
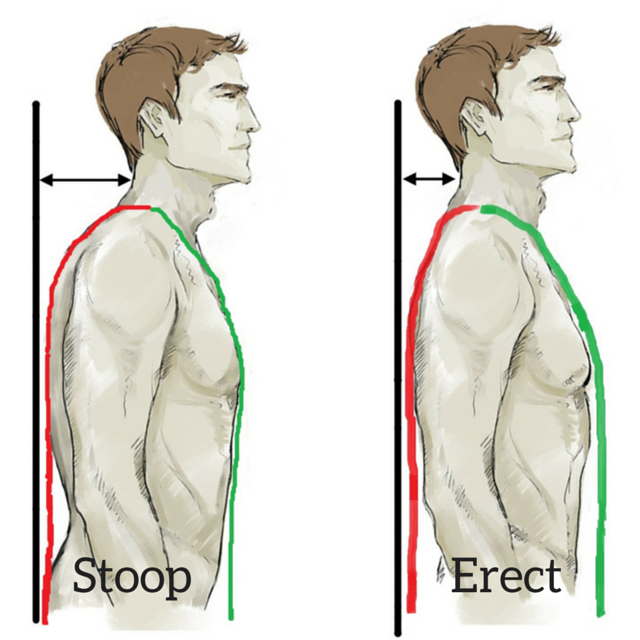
Two things happen as a result. Firstly the neck point moves forward (stoop) or back (erect). Secondly the length required for the respective fronts and backs change. In a stoop the back length needs to increase as it has to get over the blades. At the same time front length needs to be shortened as it is a straighter line towards the hem at the bottom. The exact opposite happens with an erect posture – the back length needs to shorten as it has the straighter line while the front needs to be increased as it has a longer way to go over the chest and then downwards. (Apologies for the child-like felt lines!)
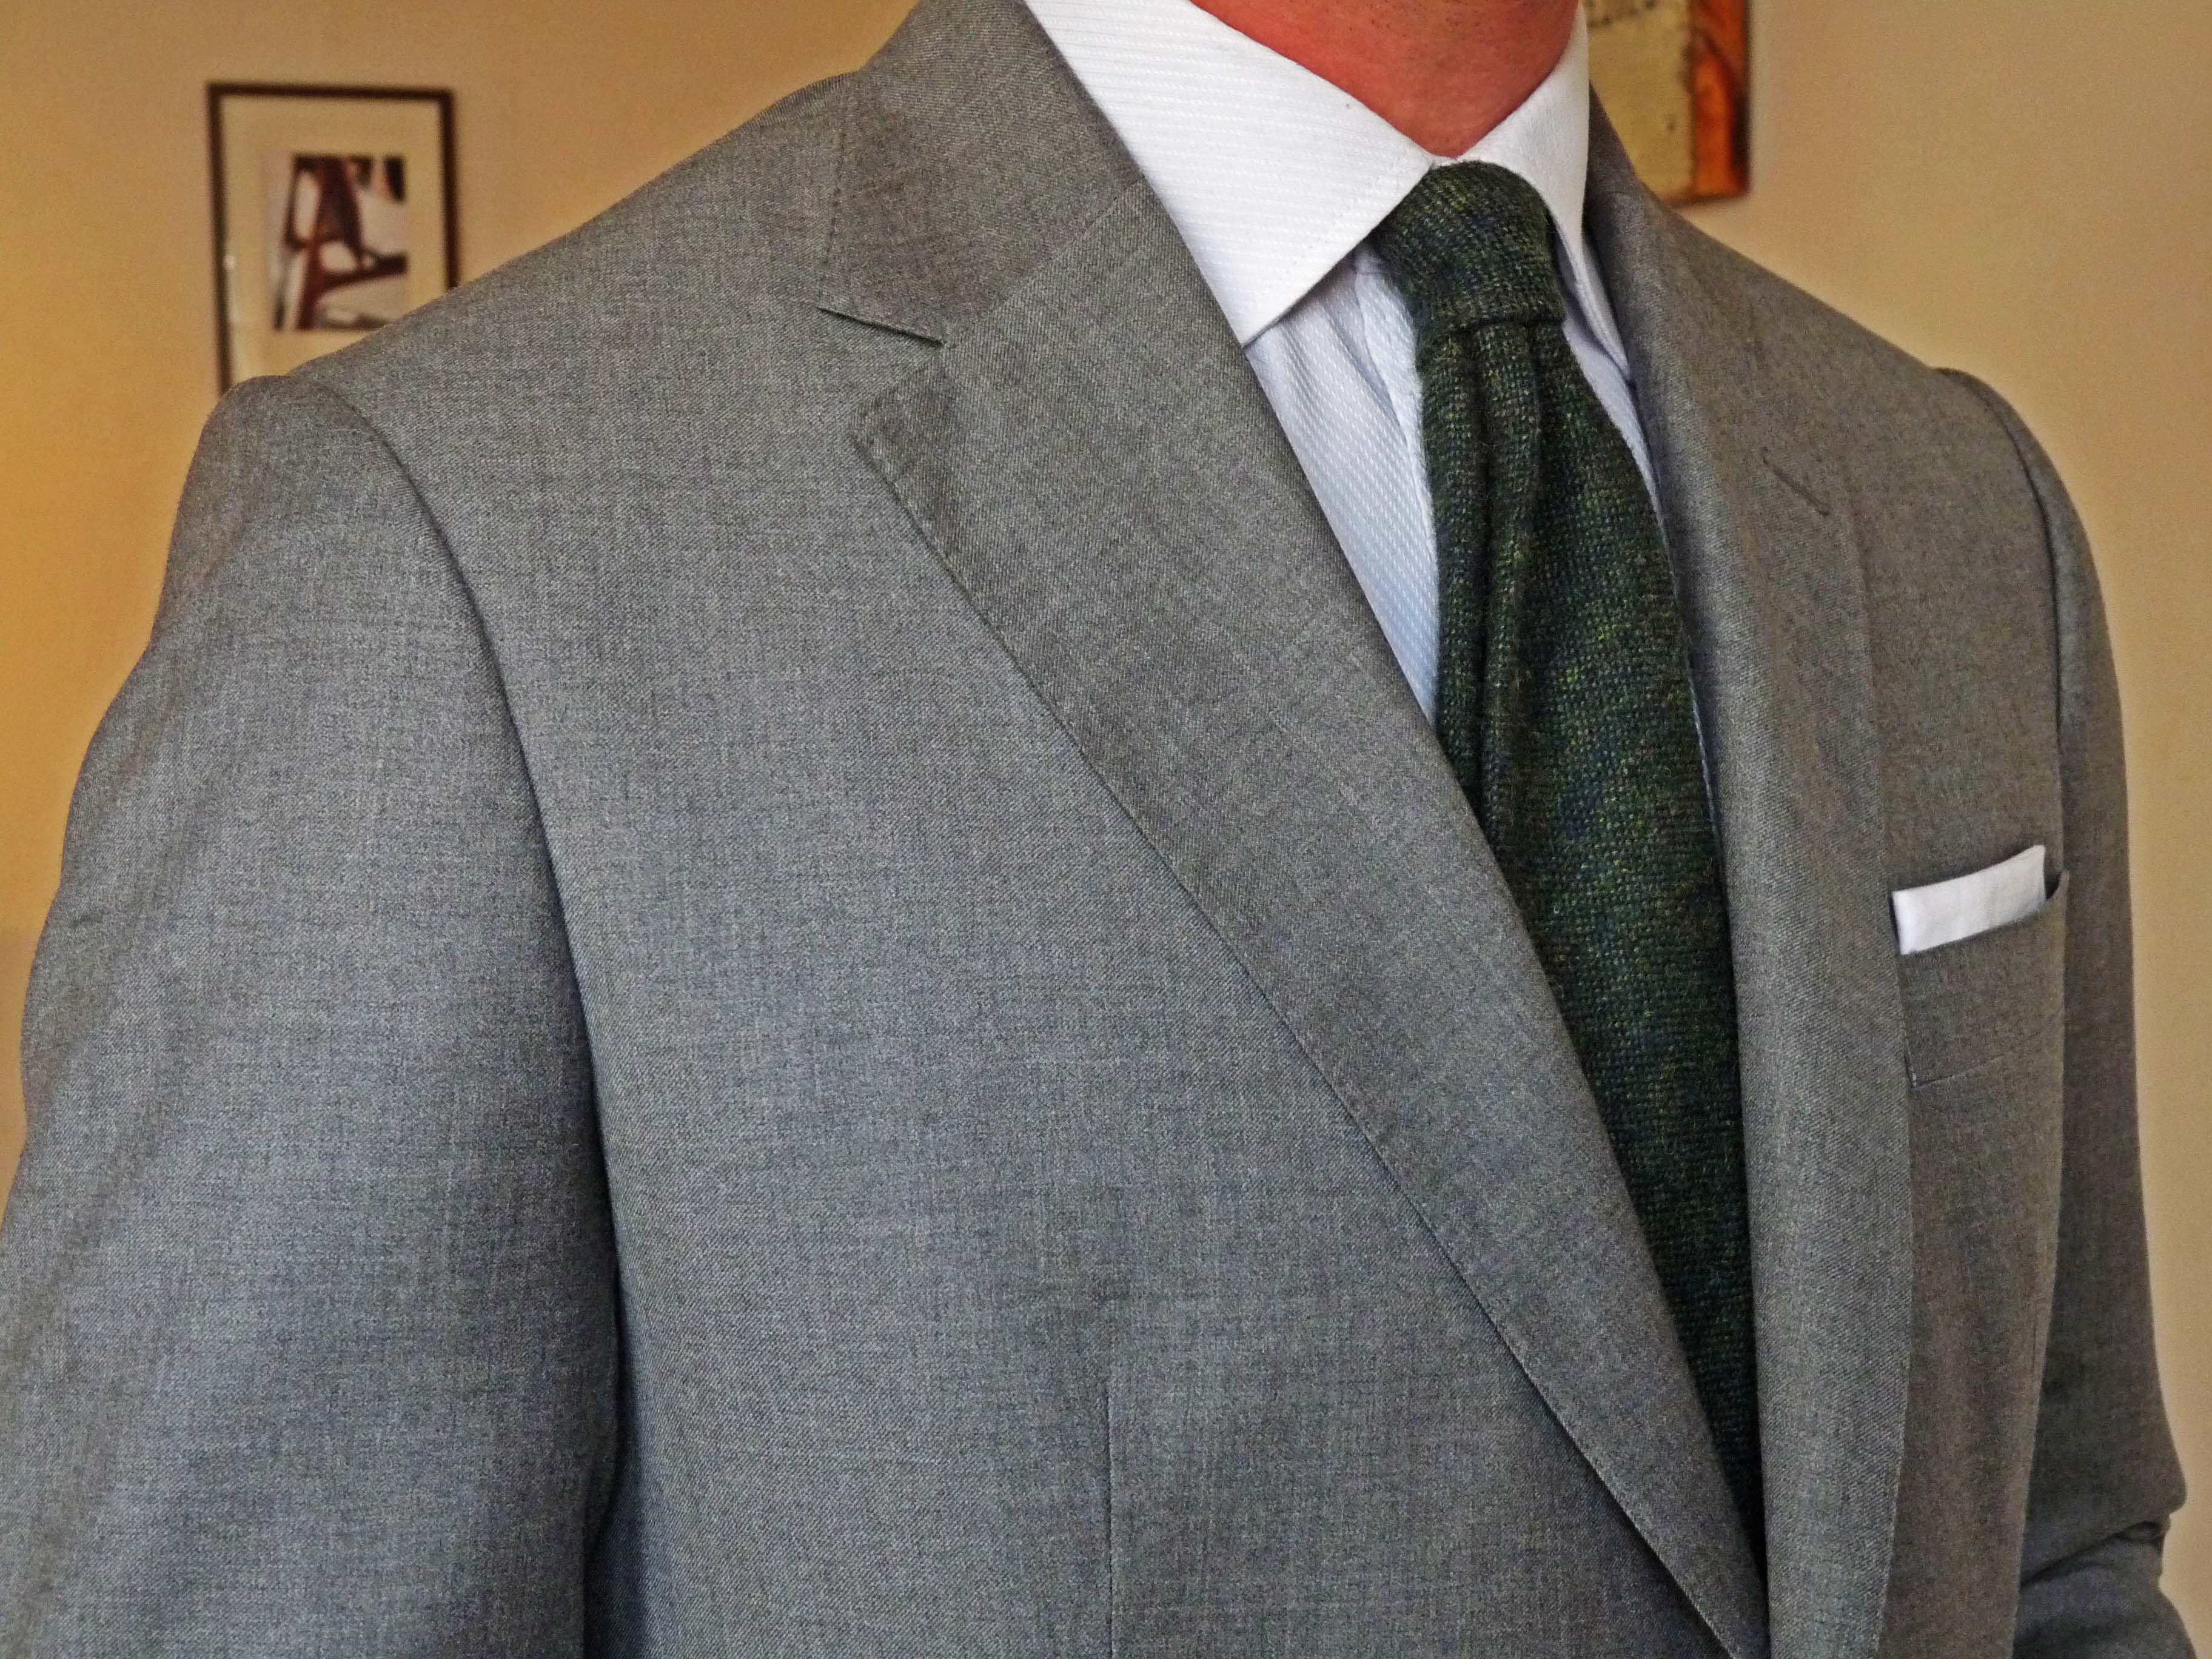
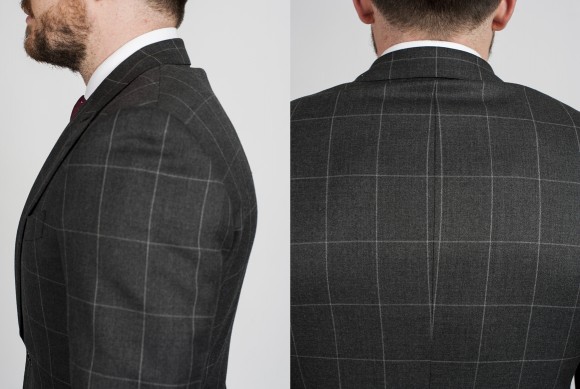
Here is a real life example of what happens to a balanced jacket when it gets put on someone with an erect posture.

Ignore the red lines for a moment and look at how the jacket is sitting. As the red arrow indicates the bottom of the jacket is kicking forward which is collapsing the back of the jacket on the love handles and seat area. This also manifests itself on the frontal view as the fronts below the button stance start crossing over.
Why is this happening? Because he is erect he needs more length on the front and less on the back. To correct it we need to take about 3/4″ off the back and add it onto the the front of the pattern. The result would be the red lines – the jacket would comfortably get over his chest and fall straight down on the front which would release the “kick effect” on the back thus pulling it off his seat and into proper balance.
2. Horizontal Balance
After dealing with vertical balance this should be a breeze. We’re still talking about the relationship between the front and back but in this case it’s on the horizontal plane – see the diagram below:
Again it comes back to posture – different postures alter the proportional relationship between the chest and the back. At times it’s balanced, at other times we need to give more to the chest and take away from the back, while at other times it’s the exact opposite. As you can see in the four diagrams there is different level of fullness on each side of the vertical line – we always need to take this into account when reading the body.
One other piece to keep in mind here – musculature. Posture defines the proportional relationship but then the muscles add a next level as they expand and contract. This leads to the inevitable discussion between tailor and client about how trim the cut should be. Certain muscles need more room than others to expand – always keep that in mind!
3. Left vs Right
This is less a posture issue and more about the skeletal make up of the body. In my experience as a tailor most of the bodies I work with are not proportional. In most cases one shoulder will lower than the other as will one hip be higher or lower. Add in sport/general life injuries and the fact that most of us have one side more developed (muscle wise) than the other there are a lot of little tweaks that need to occur to get a jacket or pant to sit in a balanced manner.
This is why you can play such a critical role in the made-to-measure or bespoke process. Nobody knows your body better than you. You see yourself everyday in the mirror and with a little attention you will see these details. With that in mind when you’re in a fitting I encourage you to mention these details – fact is as a tailor it’s sometimes hard to see all these skeletal issues when you’ve got clothes on!
4. Shoulder Angle
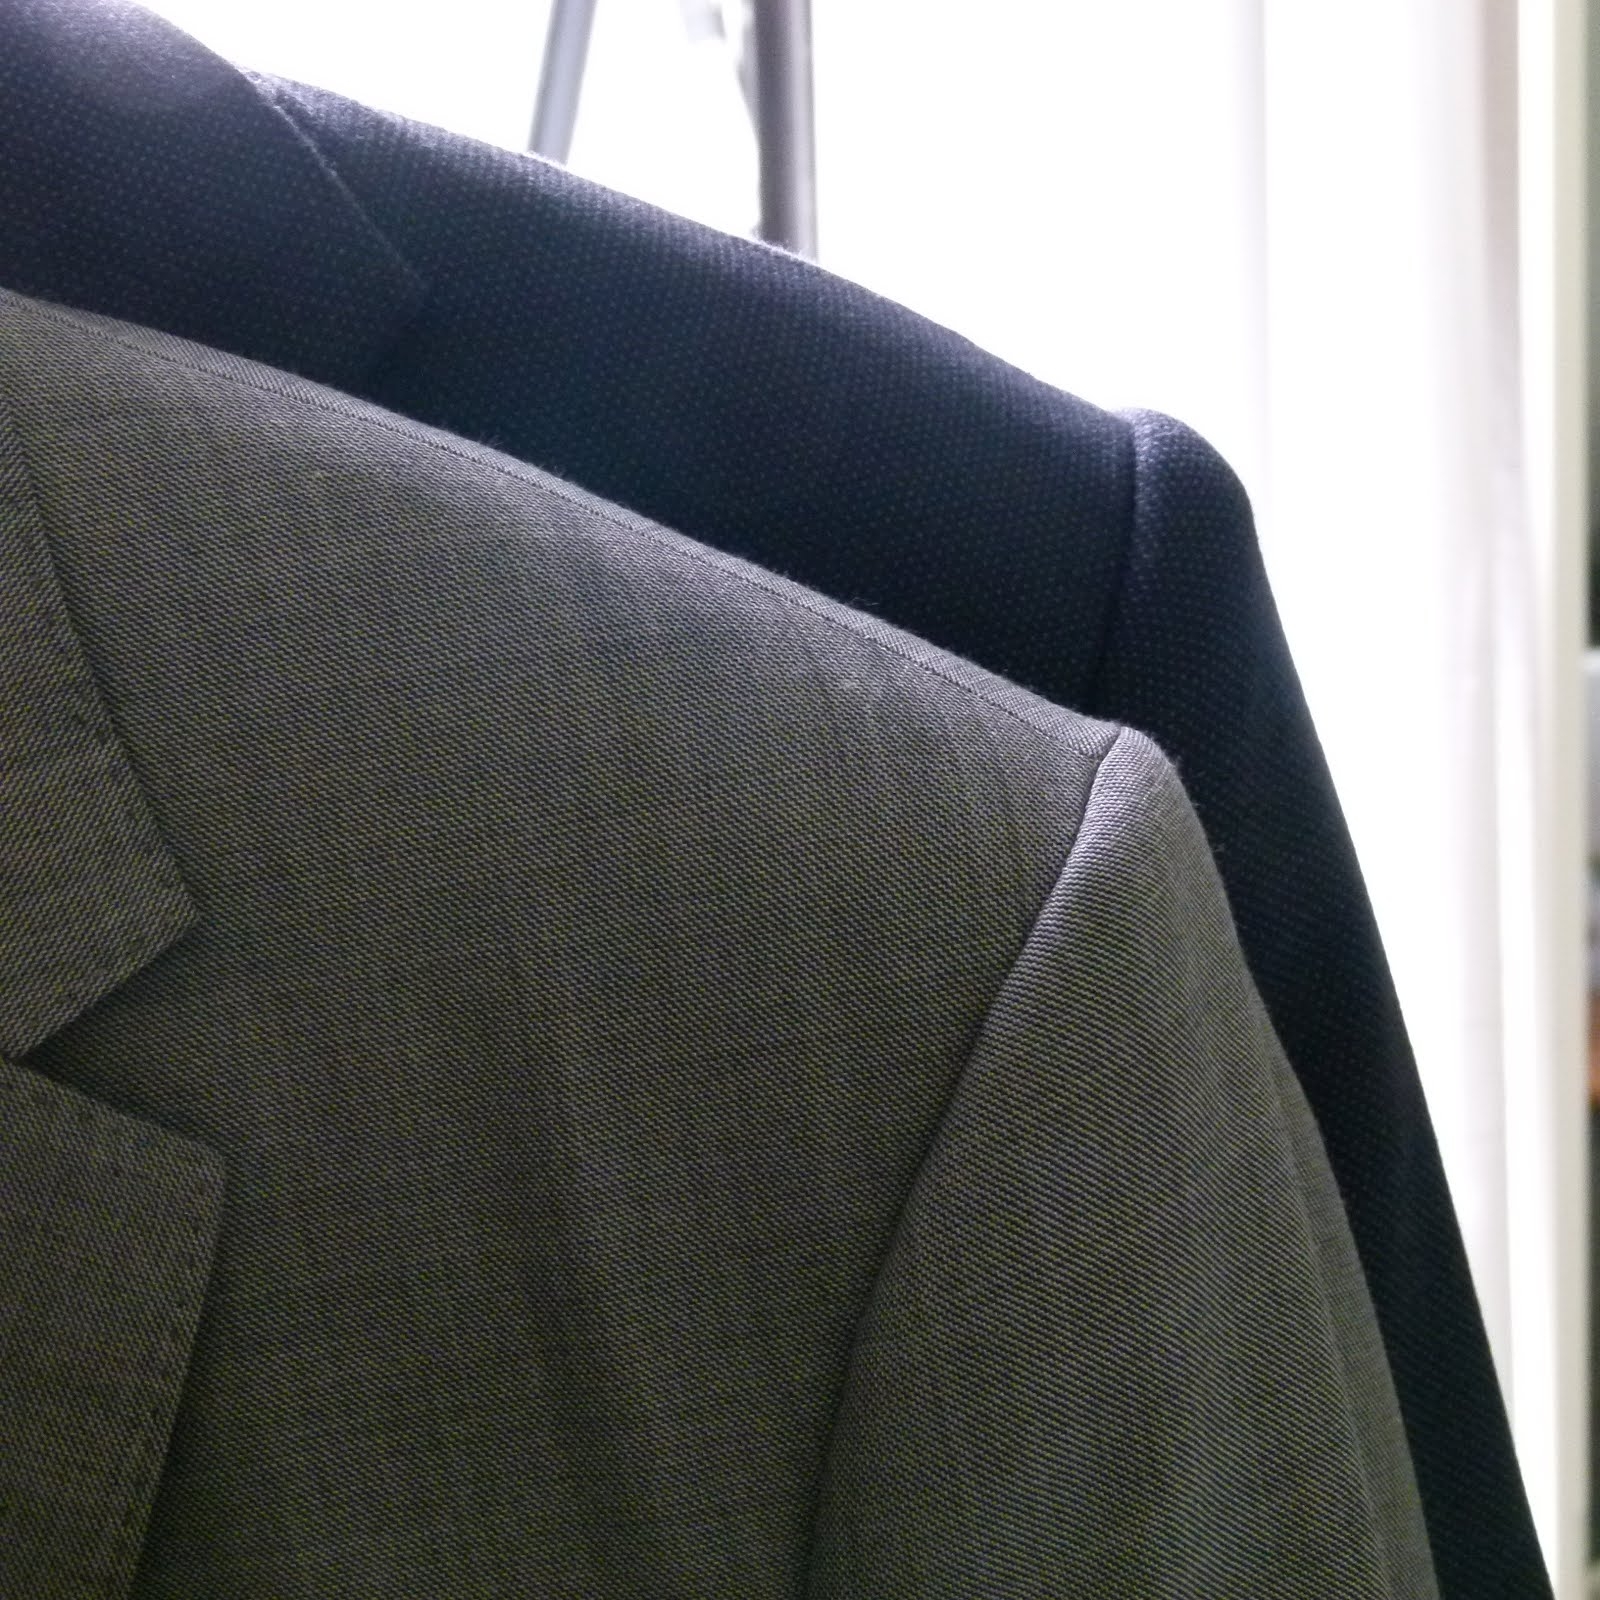
Last but not least is the angle of the shoulders. I’m sure you’ve heard it before but the shoulders set the tone for how a jacket looks and feels. Having the angle of the shoulder mirroring your body is critical to this process. Here is what we’re talking about:
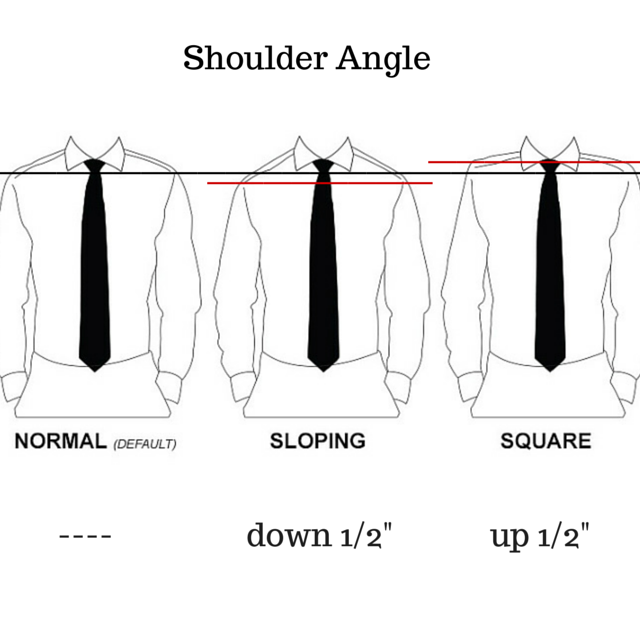
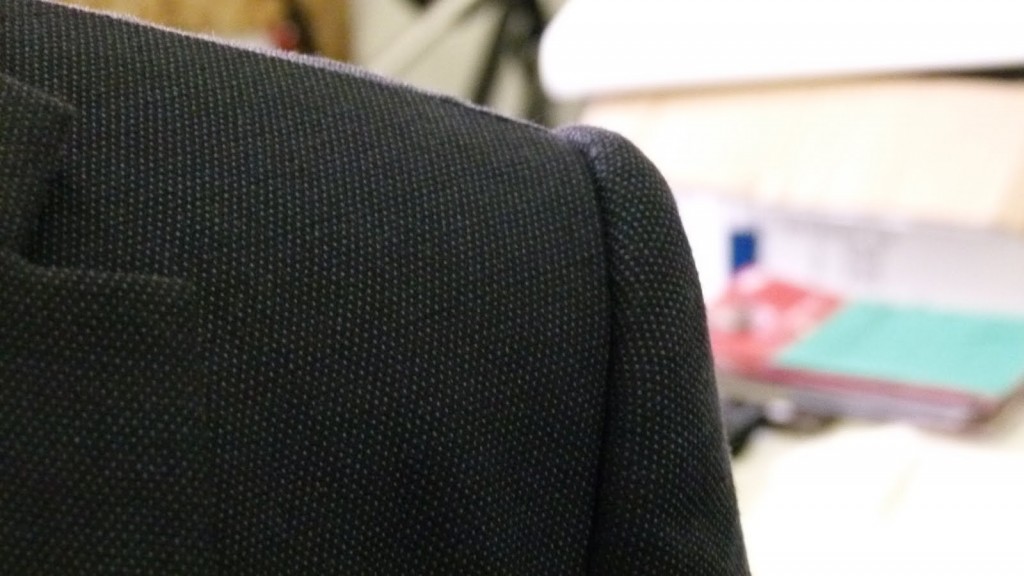
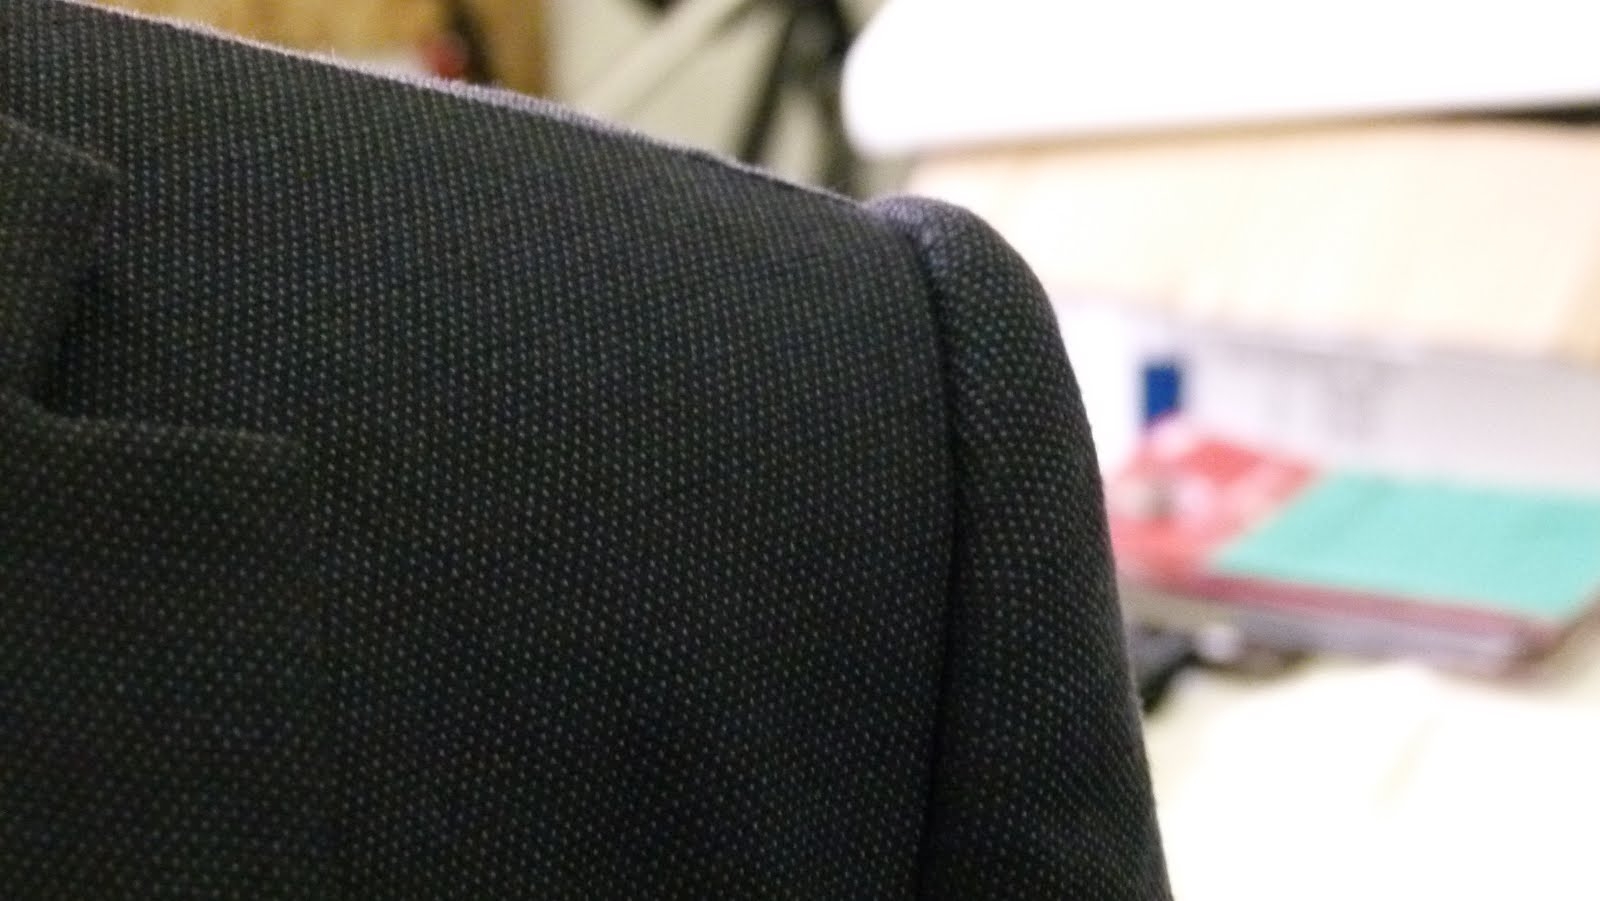
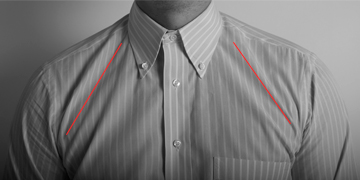
When the angle of the shoulders is off two main things happen; firstly if you’ve got square shoulders then a roll of excess fabric will occur at the base of the neck like this:
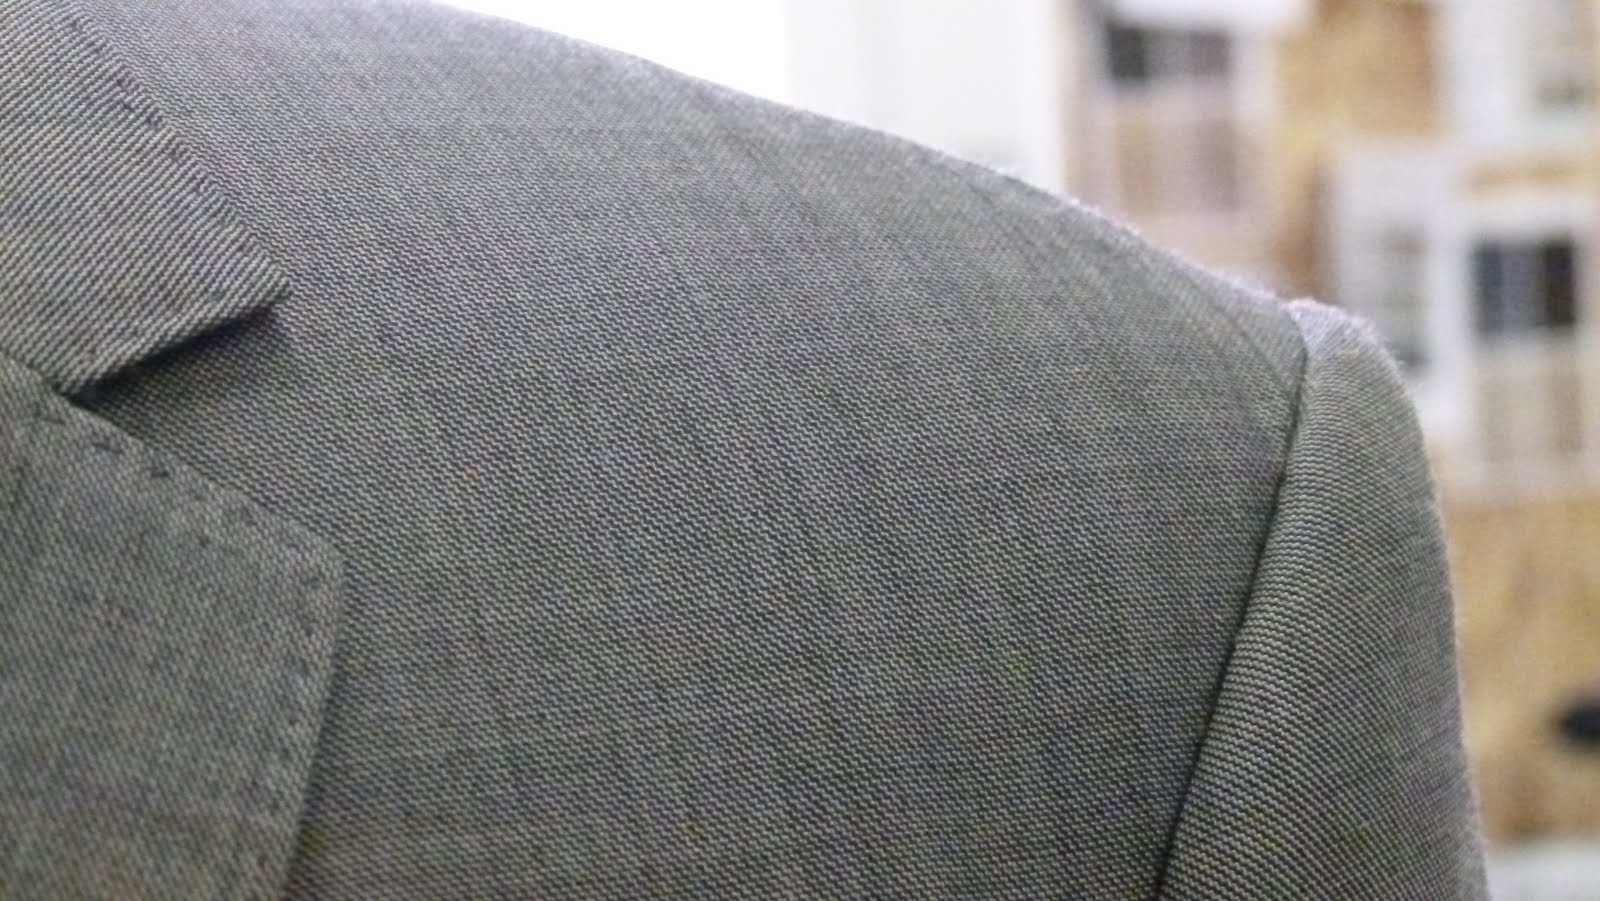
Secondly; when the shoulders are too sloped for your body then the armholes will be collapsed as you put downward pressure on them as they are located too high. It will look like this – notice the stress marks coming from the neck towards the armhole:
In both cases the angle from the neck to the shoulder point is moved either up (square) or down (sloped). Equally important though is that the bottom of the armhole is moved as well to maintain the shape and size.
In Closing
These four balance issues are crucial for clothing that fits perfectly and perhaps more importantly feels like it’s not there. As I said above if you’re going to a tailor take some time to analyze your body as it will assist in the process and get you closer to a perfect fit on the first try. By the way if your tailor scoffs at your assistance then perhaps you have the wrong tailor.
As always please let me know what you think and if you have any questions or concerns – better yet book a free appointment and we can talk some of these points through together and find out if we might be a good fit to work together.
Take care,
Michael
info@martinfishertailors.com