Without a doubt there are a lot of posts on how to achieve the perfectly fitting jacket. With that in mind I’m going to get a little technical to fill in some of the gaps; use these keys to get very specific the next time you’re purchasing a jacket whether it be with your tailor or straight off-the-rack.
A general point before we get going though; the perfectly fitting jacket should take your general shape. The days of excessive structure and padding in the jacket are gone. Instead the aim is to create a shape that softly follows the line of your body and enhances your natural silhouette as opposed to providing you with a new one.
5 Keys To The Perfectly Fitting Jacket
1. Get the shoulder and sleeve treatment right.
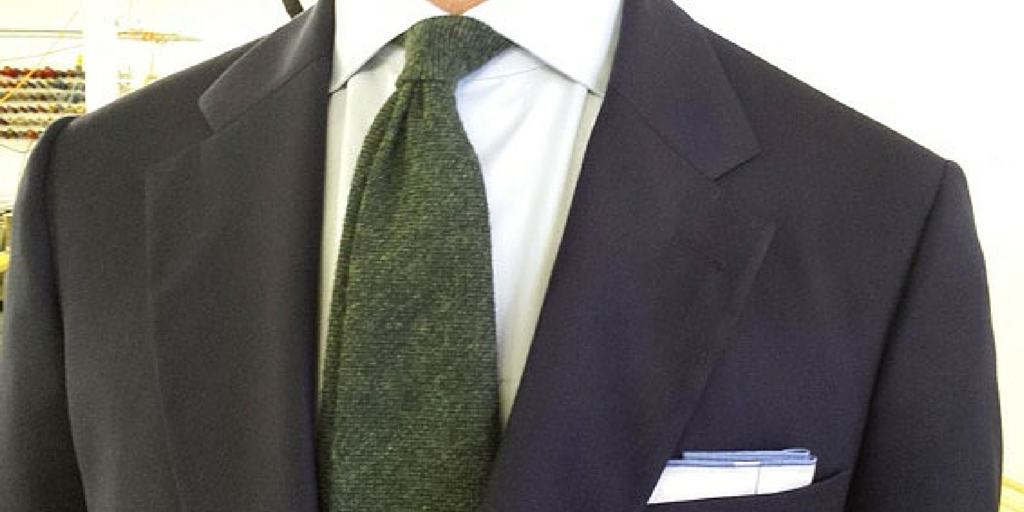
Firstly the shoulders set the tone for the jacket. In terms of pure fit the shoulders of the jacket need to correspond to the natural width of your shoulders. The seam should sit on or near the outside edge of the shoulder bone while the sleeve line falls smoothly downwards from there. Here is good example of this:
And here are two examples to avoid. On the left is a strained and collapsed upper sleeve due to the shoulders being too narrow; on the right is a protruding shoulder that ‘floats’ due to excess width creating a divot as the shoulder line falls downward.

But there is some leeway that can be used to create a subtle visual manipulation. It comes from finding the right combination between the angle of the shoulder seam and the type of sleeve that is chosen.
With the aforementioned shoulder bone as the guide we can set the sleeve inside, on or outside of this point. The key in this is subtlety – we’re talking about a total shift of a quarter inch or so. The top image below is set outside thus creating an inward angle from the shoulder to the chest. The bottom image is an example of an more inside set – the result being a straighter angle from the shoulder to the chest.

Why would we do this? To manipulate how the shoulders look. An outside set makes the shoulders look bigger while an inside set makes them look smaller. This is extremely helpful for guys with bigger mid sections – by setting the seam outside we make the shoulders appear wider in relation to the belly which visually slims the overall silhouette. As for the sleeve – when it’s set inside we need to add fullness to the top of the sleeve so as to allow it to smoothly get over the deltoid muscle and not collapse as seen above.
2. Get the chest and height of the armhole right.
These are dealt with together due to the fact that the two points come together at virtually the same spot. The key piece of information though – the higher the armhole the better. Feeling your armhole is not a bad thing – it should not restrict you in any way but feeling it something that is encouraged.
Why is this? The higher the armhole the more independent the arms movement is from the rest of the jacket. With a low armhole the sleeve actually attaches below the chest level thus every time the arms move it pulls at the area around the chest. The result is a jacket that is constantly shifting and hence uncomfortable.
A secondary aspect of the high cut armhole is that we’re able to achieve a cleaner and trimmer chest as a result; this being due to the fact that the actual armhole itself is cut smaller. It also allows for a longer line from the bottom of the armhole to the hem of the jacket. We want this line to be as long as possible because it helps visually elongate the body. It also enables a more slimming angle towards the button stance than if it began from a lower point.
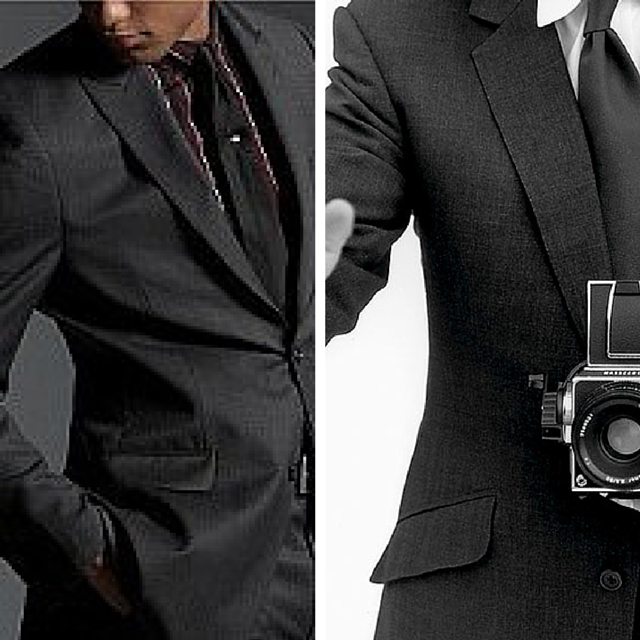
Apologies for the grainy picture on the left above – fitting that a bad picture is of a bad armhole. Notice the pulling that occurs with the arm slightly raised to enter the pocket. Compare this to the image on the right which is perfectly clean despite the fact that his hand is raised chest high.
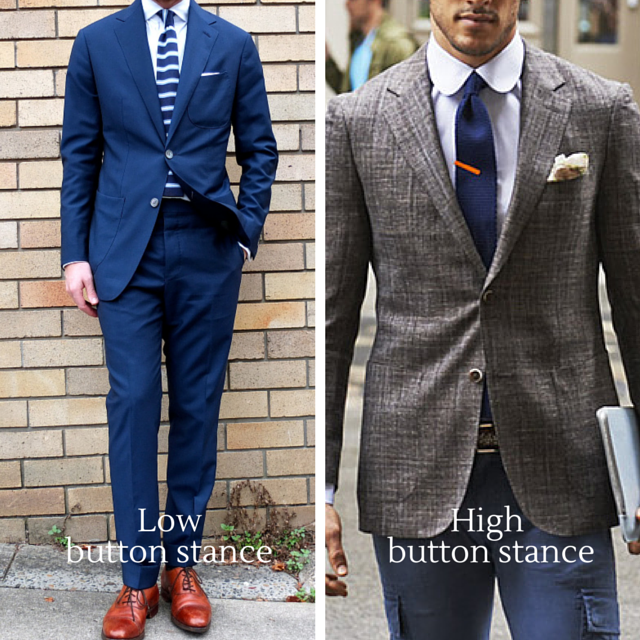
3. Get the button stance right.
The button stance is the narrowest point on the jacket hence it needs to correspond to the narrowest point on the body. On most of us that means a slightly lower sitting stance; roughly 2-3 inches above the belly button at which point our love handles begin. Keep in mind that lower is better as it creates a longer “V” from our collar down to the button. A longer line visually elongates our bodies making us appear slimmer and taller.
In terms of width – the button stance should be trim without being tight. In days gone by the norm used to be that you could fit a full fist between your stomach and the jacket when it was pulled forward; nowadays it’s more like half a fist. As a loose guide the jacket at the button stance should be between 3 – 4 inches bigger than your belly measurement. Finding the exact amount is a personal choice – that said keep in mind that too much is sloppy while stress wrinkles from being too tight is simply bad.
4. Get the hip and seat right.
Perhaps the most overlooked aspect of getting a jacket to fit perfectly. Far too many guys get fixated only on how the jacket looks from the front. No where does the full 360 degree view matter as much as it does when dealing with the hip and seat areas – get the whole picture right.
When it’s too tight two things occur; first being the jacket looses its fluidity as it gets caught up on the hips. Secondly the vents gape open which is a clear sign to everyone that your jacket is flawed. On the flip side when its too loose you can see a ‘wave’ of excess cloth on the side panel in front of the vents. This leads to visual weight; particularly from the frontal view as a clear flare occurs in the skirt of the jacket. In both cases subtlety reigns supreme – literally one to two inches in the overall circumference is the difference between a perfect fit or not.

5. Get the body and sleeve lengths right.
It sounds simple enough but when I look around town these are two points that seem to be constantly missed – the body I can somewhat forgive but the sleeves I cannot.
The body is legitimately difficult because it is a combination of style and the proportions of your body. In recent years fashion has leaned towards the cutting of a shorter jacket. This is fine but it needs to be in sync with your proportions. The traditional rule has always been that the jacket should cover your seat; keep this in mind as you think about whether or not you want a shorter more contemporary cut jacket. One inch above your seat is proportional and fashionable while two inches is likely just plain short. As for longer – regardless of your proportions I suggest you never go further than the bottom of your seat.
As for the sleeves there is no excuse to miss here as you must show cuff – between 1/4 and 3/4 of inch. The reason is to create a hint of contrast at the wrist that combines with the shirt and tie at the front. Failure to do so means the suit threatens to overwhelm the entire look – it’s akin to a wall of one color coming at the viewer. The contrast softens the look and makes you look like you’re not wearing your older brothers clothes.

Don’t hesitate to get in touch if you have any questions – you can also set up a free appointment to talk some of these points through and to find out if we might be a good fit to work together.
Take care,
Michael
info@martinfishertailors.com


