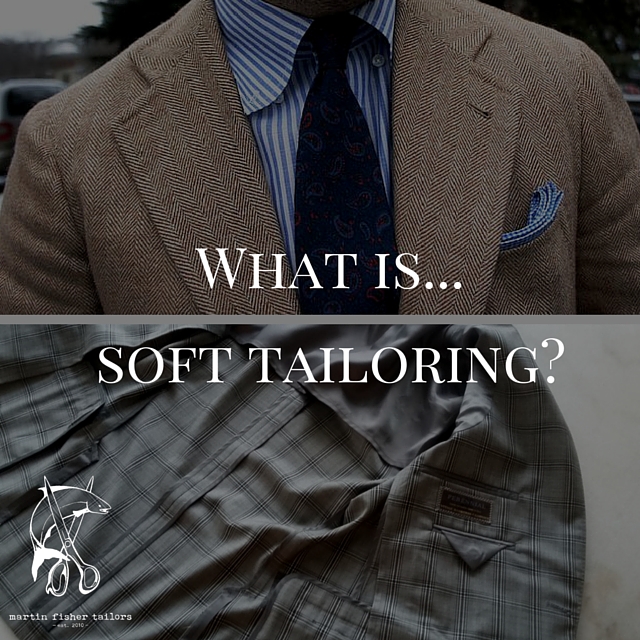
Tag Archives: what is…series

What is Wednesday #20

What is Wednesday.

WIW#20

This weekly What is Wednesday post is aimed at answering some of the more basic and critical aspects of tailoring and the terminology we use to describe them. It stems from realizing that I’m constantly throwing out different terms with my clients and quite often they’re unsure as to what I exactly mean.  The goal of this section then is to alleviate this terminology gap and provide you with some know-how to talk tailoring with a little more ease.

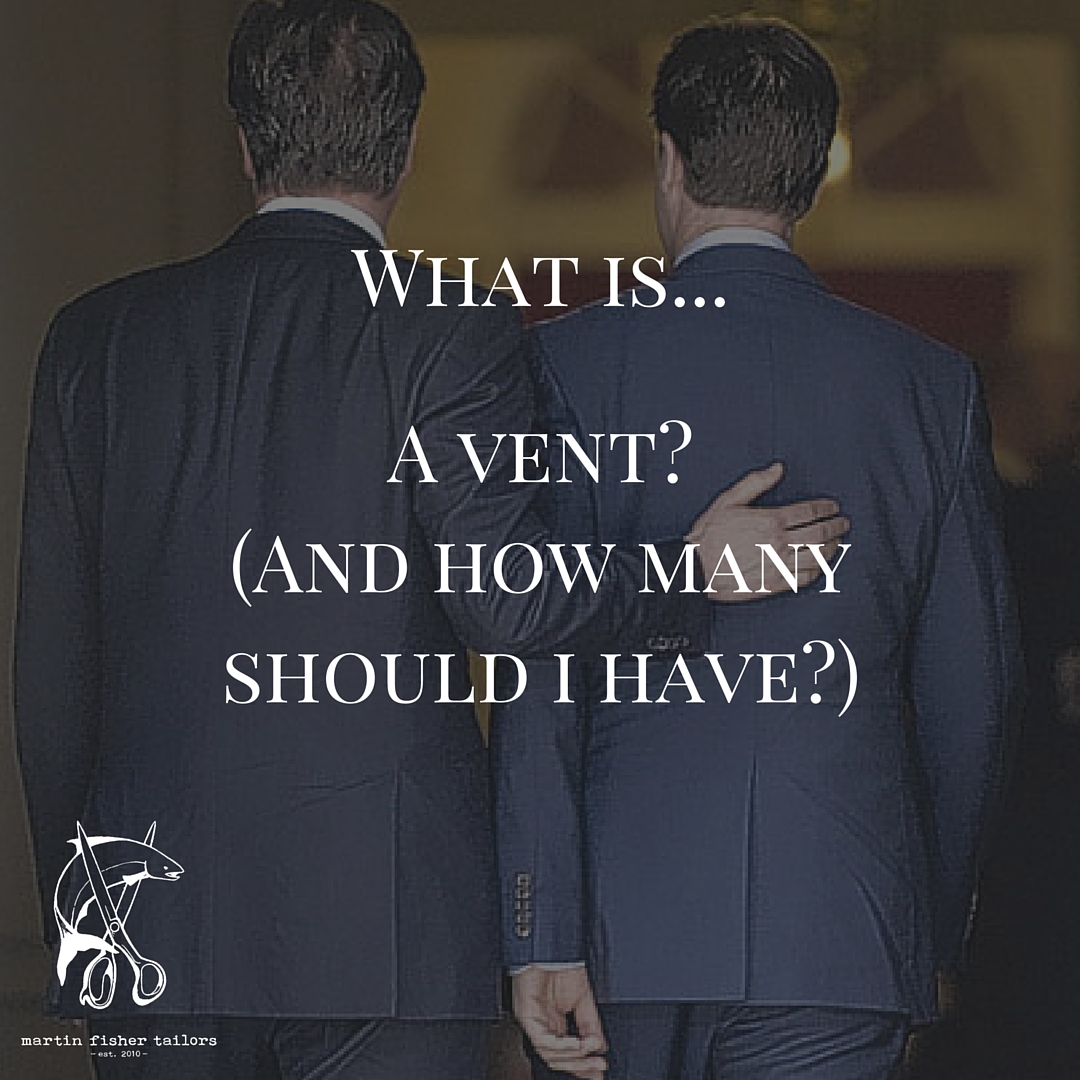
What is…a vent? (And how many should I have?)

A vent is a vertical slit on the back of jacket that rises upwards from the bottom hem – its purpose is to allow for a greater ease of movement when wearing the jacket.  There are two options to choose from – the single vent or double vent – as can be seen in the image below:

WIW#20 II

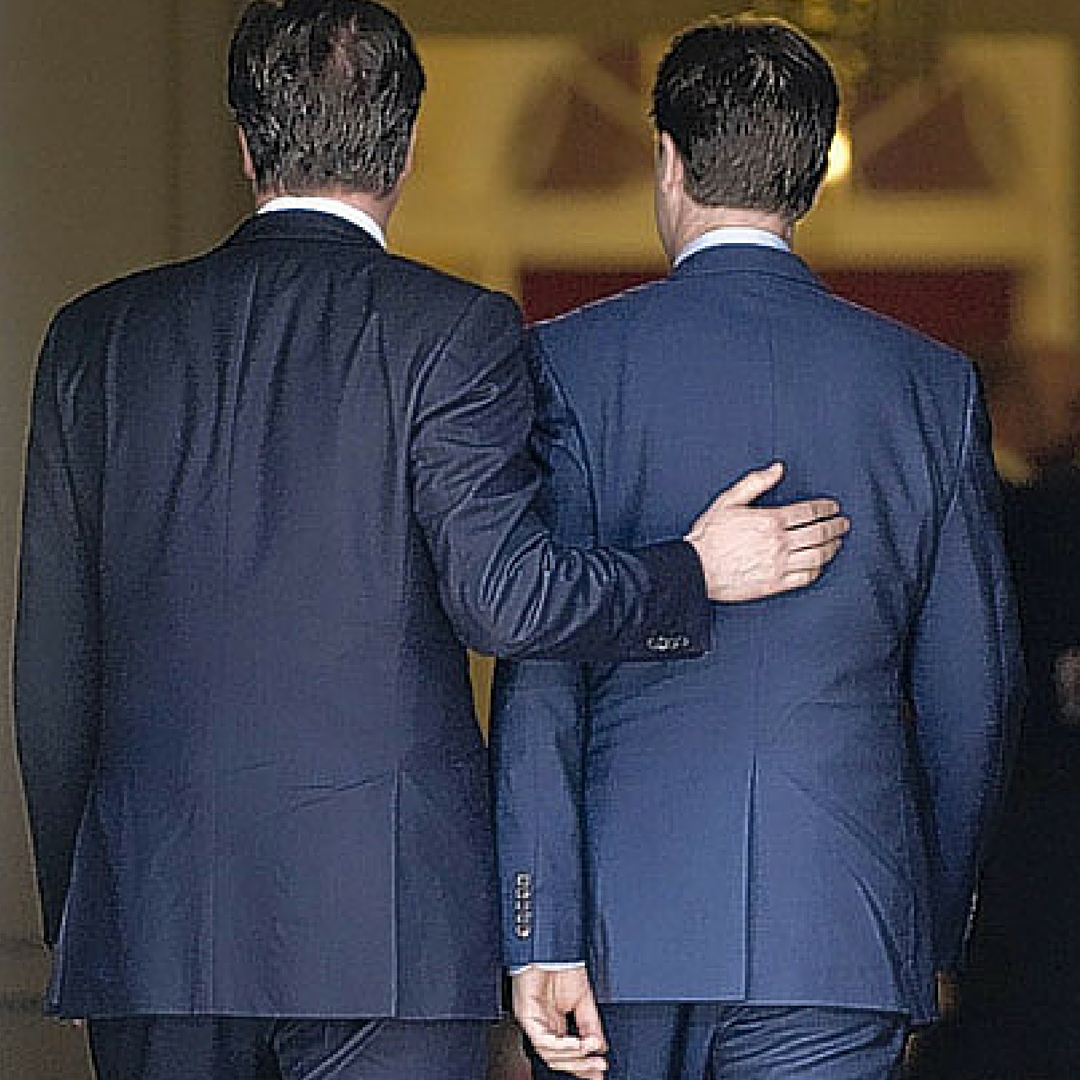
On the left is British PM David Cameron in a double vented jacket; while on the right is his Deputy PM Nick Clegg in a single vented jacket.  Both options are equally correct and look good when they lie flat and at a 90 degree angle as seen here.

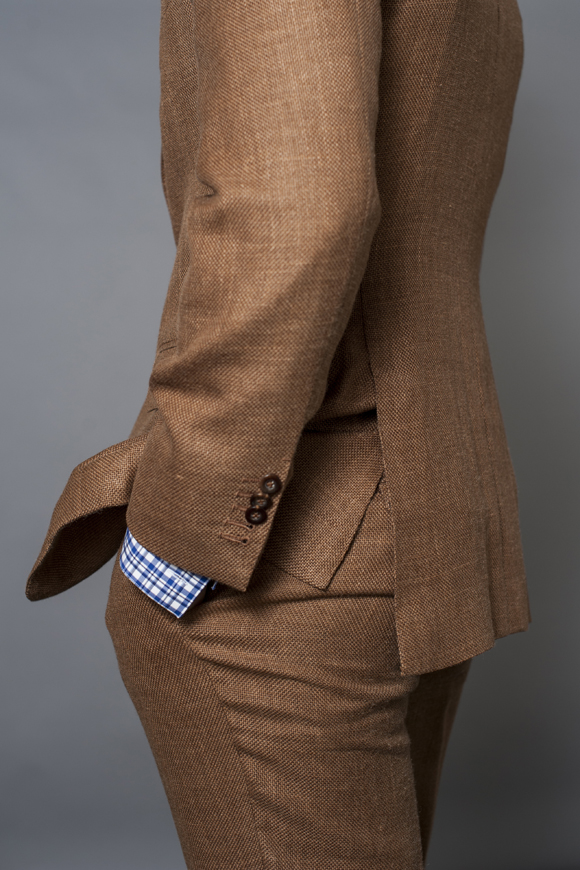
Which brings up the big question – which option is preferable?  My first response to clients is always whatever looks aesthetically cleaner to their eye.  In most cases they don’t have an opinion thus response number two – do you put your hands in your pockets?  If the answer is yes then you should always choose the double vent.  The reason is the double vent creates a flap that covers your seat when your hands enter the pockets of your pants just like can be seen here:

vents

If you don’t put your hands in your pockets then my advice is to still stick with the double vent – reason being that two vents simply allow for more ease of movement than one thus allowing us to cut the garment a touch closer in other areas.  I would also add that aesthetically it looks more balanced – but that is just my personal opinion of course!

As always please don’t hesitate to get in touch if you have any questions or comments. Better yet book a free appointment and we can banter in person and see if we might be a good fit to work together.

Take care – Michael

info@martinfishertailors.com

What is Wednesday #19

What is Wednesday.

WIW #19

This weekly Wednesday post is aimed at answering some of the more basic and critical aspects of tailoring and the terminology we use to describe them. It stems from realizing that I’m constantly throwing out different terms with my clients and quite often they’re unsure as to what I exactly mean.  The goal of this section then is to alleviate this terminology gap and provide you with some know-how to talk tailoring with a little more ease.

What is…meant by contrast button and buttonhole thread?

Before I begin though – happy new year!  I trust the holiday season treated you well and you’re ready to go for the upcoming year.  Although the break was fantastic I must say it’s nice to be back – let’s get to it.

Contrast thread – whether to create the buttonhole or the thread used to attach the button itself – is simply a thread done in a different color than the suit cloth itself.  The image below is a great example of both options.

WIW #19 II

At the very top is an example of a contrast buttonhole done in pink thread; you then see the same pink thread used to attach the buttons themselves.  This is obviously a pretty intense contrast with the blue cloth – do keep in mind that the level of contrast can be as bold or as minimal as one likes.  In fact with this type of blue cloth you’ll often see a white or soft navy as the contrast thread – both being distinctly more subtle than the pink yet still providing a hint of detail that many guys find appealing.

Keep in mind that you don’t need to do both; or either for that matter.  It must be noted that doing the buttonhole is a pretty aggressive play – you have to feel comfortable with your suit always playing a more fashion forward roll if you choose this path.  If you’re entering the world of law or banking I would advise against it until you’re well up the food chain; if ever at all.  As for the button thread – this is a much more subtle approach.  The impact is only seen upon closer inspection and provides the wearer with much of the joy as opposed to screaming it out to the rest of the world with the buttonhole.  More importantly though it’s easily changed in five minutes if you grow weary of it – something which is not possible for the buttonhole!

As for my opinion – on a personal level I never choose the contrast buttonhole as it’s too drastic for me.  My subtle detail is brown buttons on my suits (I only wear brown shoes) thus I keep the thread matching the cloth as it always contrasts the button anyways.  To each their own – the question is what is yours?

As always please don’t hesitate to get in touch if you have any questions or comments. Better yet book a free appointment and we can banter in person and see if we might be a good fit to work together.

Take care – Michael

info@martinfishertailors.com


What is Wednesday #18.

What is Wedsnesday.

WIW #18 III

This weekly Wednesday post is aimed at answering some of the more basic and critical aspects of tailoring and the terminology we use to describe them. It stems from realizing that I’m constantly throwing out different terms with my clients and quite often they’re unsure as to what I exactly mean.  The goal of this section then is to alleviate this terminology gap and provide you with some know-how to talk tailoring with a little more ease.

What is…the right amount of shirt cuff to show?

At a minimum you need to show a quarter inch – no questions asked.  If you want to play down the middle then a half inch is the way to go; for those wanting to push the boundary slightly you can show three quarters to a full inch – beyond that lies the danger of being a bit peacock’ish which I don’t recommend.

Why is it so important to show cuff in the first place?  It’s all about proportion and balance.  By having the shirt cuff visible at the wrist it softens the overall look and ties in with what is happening in the neck area.  Failing to do so means there is too much suit cloth which begins to overpower the overall look.

WIW #18 II

These two fellows are about as perfect as it gets – half inch on the left and a full inch on the right.  Both of these images give you a real sense of the balancing effect the pop of shirt color has at the wrist.

As always please don’t hesitate to get in touch if you have any questions or comments. Better yet book a free appointment and we can banter in person and see if we might be a good fit to work together.

Take care – Michael

info@martinfishertailors.com

What is Wednesday #17.

What is Wednesday.

WIW #17

This weekly Wednesday post is aimed at answering some of the more basic and critical aspects of tailoring and the terminology we use to describe them. It stems from realizing that I’m constantly throwing out different terms with my clients and quite often they’re unsure as to what I exactly mean.  The goal of this section then is to alleviate this terminology gap and provide you with some know-how to talk tailoring with a little more ease.

What is…meant by having kissing buttons?

When we say the buttons are “kissing” it simply means they are touching each other.  This can occur in two ways; in the top image below you see the overlapping technique.  This creates different angles to which the buttons lie which to some is visually more interesting.  The second option can be seen in the bottom image; in this case the buttons don’t overlap but instead they are simply abutting one another.

WIW #17 II

This weeks discussion is of course a natural follow up to the relevance of the surgeon’s cuff that was discussed.  In terms of a tie in; both of these methods are possible options when using a surgeon’s cuff or when choosing a cuff that has decorative buttonholes that actually don’t function.  And lastly why would you choose one option over the other?  No reason other than aesthetics – one will simply look better to your eye and that is the one you should go with.

As always please don’t hesitate to get in touch if you have any questions or comments. Better yet book a free appointment and we can banter in person and see if we might be a good fit to work together.

Take care – Michael

info@martinfishertailors.com

What is Wednesday #15.

What is Wednesday.

WIW#15 - high armhole

This weekly Wednesday post is aimed at answering some of the more basic and critical aspects of tailoring and the terminology we use to describe them. It stems from realizing that I’m constantly throwing out different terms with my clients and quite often they’re unsure as to what I exactly mean.  The goal of this section then is to alleviate this terminology gap and provide you with some know-how to talk tailoring with a little more ease.

What is…the reason for having high armholes?

The issue of high armholes is perhaps one of the more miss-understood elements of jackets; let it be said once and for all that higher is simply better.  The reasons are the following; it allows you to have a far greater ease of movement, it’s more comfortable and it looks way better as it allows for a trimmer fit in the chest.    The example below shows this quite beautifully:

WIW#15 - high armhole (1)

Ease Of Movement.

Notice how the fellow in the image above has his arm extended to shoulder level.  As you can see there is essentially no lifting, twisting or movement at all in the jacket as a result of this movement.  This is because the sleeve is able to act independently from the body of the jacket due to the higher cut armhole.  Eventually the jacket will start to rise but only as the arm gets above the shoulder level; in the event the armhole was cut lower then the body would be pulled upwards as the arm hits the chest level.

Comfort.

This is primarily due to the fact that the jacket isn’t moving around with each arm or body movement.  This point shouldn’t be underestimated – constant movement of the jacket means constant fidgeting to get things back in place which never looks or feels good.

Cleaner Appearance.

The higher armhole enables the chest to be kept trimmer and cut closer to the body; this takes away a lot of the puddling that we often see right below the armhole which adds unnecessary visual bulk.  Another factor is a longer silhouette from the bottom of the armhole to the bottom of the jacket; this elongates the body and is a big aspect of making a body look longer and leaner which is fairly often a goal of most clients.

As always please don’t hesitate to get in touch if you have any questions or comments. Better yet book a free appointment and we can banter in person and see if we might be a good fit to work together.

Take care – Michael

info@martinfishertailors.com

What is Wednesday #14.

What is Wednesday – sleeve pitch.

WIW #14 - sleeve pitch

This weekly Wednesday post is aimed at answering some of the more basic and critical aspects of tailoring and the terminology we use to describe them. It stems from realizing that I’m constantly throwing out different terms with my clients and quite often they’re unsure as to what I exactly mean.  The goal of this section then is to alleviate this terminology gap and provide you with some know-how to talk tailoring with a little more ease.

What is…sleeve pitch?

The sleeve pitch refers to the angle that the sleeve is attached at the armhole; the chosen position and angle being based on the wearer’s natural arm position.  In the image below we can see the results of perfect sleeve pitch; notice there is absolutely no pulling or twisting in the sleeve as it is smoothly follows the natural arm position of the wearer.

WIW #14 - sleeve pitch II

The good news is that in general the majority of people hold their arms at relatively the same angle as we see above; the shoulders are neutral with the hands resting at ease just behind the hips.  That said there are different postures that influence where the arms are naturally held and thus the angle with which we need to set the sleeve itself.  In the case of an erect posture the shoulders are held back; the result is the arms hang at an angle that finishes closer to the seat. Conversely those who work at computers all day tend to have a forward posture with shoulders rolled the front; the result being the arms are held at an angle that finishes closer to the front of the body.

In essence there are three positions – standard, forward and back.  What occurs is the sleeve is rotated either forwards or backwards to change the angle.  Below is a fantastic animated diagram from Style Forum’s Tailorgod that shows exactly what happens as this rotation occurs.

sleevepitchanimation

In this diagram X refers to the standard neutral position.  Notice the arrow pointing down at the top of the sleeve when it is in the neutral position; this is the base point for the rotation.  In X2 that point is rotated slightly forward; the result being the pitch of the sleeve shifts to an angle that falls back towards the wearer’s seat. Conversely in X3 the top is rotated slightly to the back; the result is of course the opposite as the sleeve falls on a forward pitch that ends closer to the front hips.  Keep in mind these changes are to mimic the wearer’s arm angle and thus achieve a clean line in the sleeve void of any pulling or twisting.

Makes sense?  Again this is a slightly technical post but one that is critical to having a beautifully set sleeve which is one of the key hallmarks to a jacket.  As always please don’t hesitate to get in touch if you have any questions. Better yet book a free appointment and we can banter in person and see if we might be a good fit to work together.

Take care – Michael

info@martinfishertailors.com

What is Wednesday #13

What is Wednesday.

WIW #13

This weekly Wednesday post is aimed at answering some of the more basic and critical aspects of tailoring and the terminology we use to describe them. It stems from realizing that I’m constantly throwing out different terms with my clients and quite often they’re unsure as to what I exactly mean.  The goal of this section then is to alleviate this terminology gap and provide you with some know-how to talk tailoring with a little more ease.

What is…the difference between a roped, natural and shirt style sleeve?

In this context what we’re talking about how the sleeve is attached to the body of the jacket – more specifically the treatment that occurs on the most visible area at top of the shoulder. There are many techniques out there but three are predominantly used; roped, natural and shirt style.

Roped Style

I’ll start with roped because it’s the most decorative and easily recognizable of the bunch.  As you can see in the image below there is a very clear height differential between the top of the sleeve and the top of the shoulder.  This is a decorative way to delineate the end of the shoulders and the beginning of the sleeve.  This image is a pretty standard roped sleeve – if the height differential were more prominent we would describe it as being a stronger rope as opposed to a moderate one.  Reasons for choosing this treatment?  One is you simply like the decorative appearance; two is that you might have smaller or sloping shoulders thus you want to visually increase their impact.

WIW #13 II

Natural Style

As North Americans this is by far the most recognizable and popular sleeve style.  It is best described as having a very subtle and soft bump at the point of transition from the shoulder to the sleeve.  It’s important to know that the circumference of the sleeve is actually bigger than the actual armhole; this is done so that the sleeve falls gracefully over the deltoid muscle as opposed to sitting right on top of it and restricting movement.  It is for this reason that there is a subtle bump as it creates that separation (and yes that means the roped style has even more separation) which is then filled with the sleeve head as discussed in What is Wednesday #11.

Shirt Style

The shirt style is the most casual of the three and is more often found on unstructured or very lightly structured jackets.  It’s roots are found in the tailors of Naples and as you can see in the image above the sleeve itself is actually lower than the shoulder.  This is because the seam allowance from sewing the sleeve and the shoulder together is pushed back towards the shoulder of the jacket.  This props the shoulder up ever so slightly in relation to the sleeve which creates a ridge.  You might also notice the slight puckering on the sleeve; this is due to that fact that that as we’ve discussed the sleeve is actually bigger than the armhole. With the first two styles the excess was at the top of the sleeve hence the varying degree in the size of the bump.  As the shirt style sits below the shoulder the excess is in the width of the sleeve as opposed to the height.  The result is the excess fullness gets eased into the armhole and the puckering is the result. Another way to think about it; with the first two styles we go over the deltoid while with the shirt style we go around it.

Make sense?  This one is definitely a touch on the technical side but is critical in helping you wade through the noise that accompanies suit terminology.  As always please don’t hesitate to get in touch if you have any questions. Better yet book a free appointment and we can banter in person and see if we might be a good fit to work together.

Take care – Michael

info@martinfishertailors.com

What is Wednesday #12

What is Wednesday.

WIW #12

This weekly Wednesday post is aimed at answering some of the more basic and critical aspects of tailoring and the terminology we use to describe them. It stems from realizing that I’m constantly throwing out different terms with my clients and quite often they’re unsure as to what I exactly mean.  The goal of this section then is to alleviate this terminology gap and provide you with some know-how to talk tailoring with a little more ease.

What is…a shoulder pad and why do we use them?

Typically made of canvas, felt and/or polyester fleece – shoulder pads are shaped roughly like a half moon and extend from the shoulder seam back over the shoulder itself.  They’re intended to create an even shape over the shoulder to allow the jacket to have a perfect platform from which to hang over the chest and back.  Throughout time they’ve come in a variety of shapes and sizes – from the bigger styles of the 80’s to the smaller version we generally see today.

The top image we see below is an example of roughly the middle ground.  Double the the thickness of the white felt in the middle and we’re getting into Gordon Gekko territory and the power suit of the 80’s.  Reduce the felt just just thinnest of layers and now you have a sense of what today’s lightly padded jacket contain.

WIW #12 II

In terms of the why; the Greek God Ares shows us how the shoulder area is anything but uniform.  In fact it’s much like a mountainous region – there are peaks and valleys and no two are the same.  Some have a lot of muscle and are round in shape, others are bony and angular, while others yet are mix of both.  And this is where the pad comes in – its role is to smooth over these variations and establish and even shape from which the jacket’s shoulders will sit.

Lastly a note on size; generally less is more.  The style of the moment is all about reducing padding and having the shoulders appear as natural as possible.  This is especially important for muscular guys as there is no need to come across looking like an NFL linebacker.

As always please don’t hesitate to get in touch if you have any questions. Better yet book a free appointment and we can banter in person and see if we might be a good fit to work together.

Take care – Michael

info@martinfishertailors.com

What is Wednesday #11

What is Wednesday.

Sleevehead

This weekly Wednesday post is aimed at answering some of the more basic and critical aspects of tailoring and the terminology we use to describe them. It stems from realizing that I’m constantly throwing out different terms with my clients and quite often they’re unsure as to what I exactly mean.  The goal of this section then is to alleviate this terminology gap and provide you with some know-how to talk tailoring with a little more ease.

What is…a sleave-head?

A sleeve-head is a rectangular’ish shaped strip of felt and canvas that supports the cap of the sleeve.  The idea is to create a soft and even fall at the top of the sleeve rather than having the cap collapse.

I say rectangular’ish because the sleeve-head is actually curved as it’s designed to support the round part of the sleeve as it goes over the shoulder.  The image below will give you a better sense of the actual shape before it is attached.

4568194391_24f5c41279

The white stripe on top is the felt while the bottom pieces are the canvas.  It’s important to note that the type of canvas is different than what we use in the chest of the jacket.  In this case it is a broken twill; it is denser and has more roll to it which is critical to properly support the top of the sleeve while still creating an overall soft feeling.

Sleevehead II

The above images will give you a better sense of where the sleeve-head actually sits.  At the top you see how the sleeve-head is inserted – do note that this example is an inside-out shoulder.  I’ve done this to show you how it is positioned in relations to the shoulder seam; the sleeve-head itself is the canvas bit that you see protruding out from the rounded area of the shoulder.  The image on the low left shows it laid over a finished jacket in the proper location.  Like I mentioned the key aspect is that it is set to protrude over the shoulder seam and into the top of the sleeve itself.  As the sleeve rolls downward over the shoulder the sleeve-head is what creates the roll enabling the sleeve to softly flow over the deltoid rather than collapsing and creating a divot.  The image in the right corner is a perfect example of this.

Make sense?  This one is definitely a touch on the technical side but is critical in helping you wade through the noise that accompanies suit terminology.  As always please don’t hesitate to get in touch if you have any questions. Better yet book a free appointment and we can banter in person and see if we might be a good fit to work together.

Take care – Michael

info@martinfishertailors.com

What is Wednesday #10.

What is Wednesday.

WIW #10

This weekly Wednesday post is aimed at answering some of the more basic and critical aspects of tailoring and the terminology we use to describe them. It stems from realizing that I’m constantly throwing out different terms with my clients and quite often they’re unsure as to what I exactly mean.  The goal of this section then is to alleviate this terminology gap and provide you with some know-how to talk tailoring with a little more ease.

What is…soft tailoring?

Soft tailoring is a bit of a catch-all phrase for describing a style of jacket that has removed all or a good amount of the materials on the inside of the jacket.  The result is a jacket that will be light, airy and allows the wearer’s body to viewed as it is – in essence it will feel more like a sweater than a typical jacket.

For those of you who have been following the series up to this point you’ll know that we’ve discussed the natural shoulder line in #7, the difference between a natural and unstructured shoulder in #8 the concept of a jacket’s expression and structure in #9.  All of these elements put together get us to this point where we arrive at either soft tailoring or a more structured style of tailoring.

WIW #10 II

The two images above are both examples of soft tailoring.  The top is on the more structured side of soft tailoring while the bottom image is as unstructured and soft as one can find.  The difference? The top image simply has an extra layer of canvas over the shoulder area that provides a touch more roundness in the appearance of the shoulder.  Both examples are still light and airy but the more unstructured and soft you go the more fluid the jacket becomes.  To some this is the pinnacle of tailoring whereas to others it looses the shape that one is looking to achieve by wearing a jacket in the first place.  At the end of the day it’s all about personal preference.

As its been lately this is again a touch technical but also critical in helping you wade through the noise that accompanies suit terminology.  As always please don’t hesitate to get in touch if you have any questions. Better yet book a free appointment and we can banter in person and see if we might be a good fit to work together.

Take care – Michael

info@martinfishertailors.com