Category Archives: Tailoring

Friday Style Debate: The Wet Sheep vs The Double Collar…

FSD insta (1)

Time to debate!

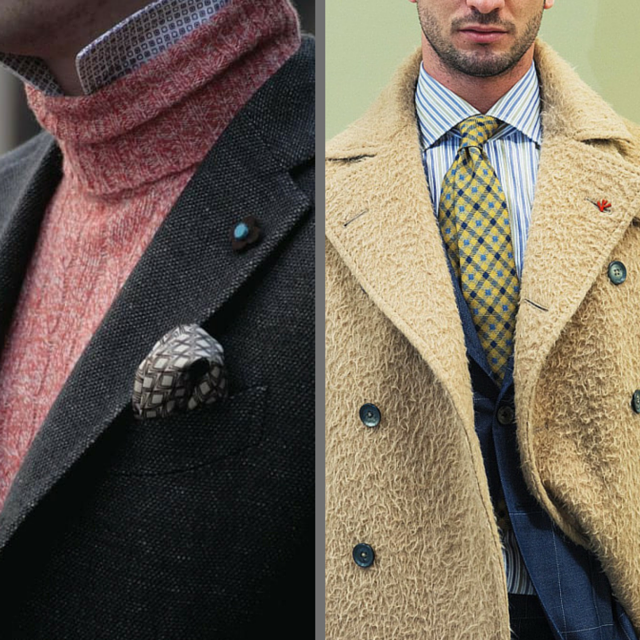
This week is a battle between my two least favorite trends of fall 2014/15.  I’m a huge fan of wool overcoats but I don’t understand the stringy wet sheep look that took off with the Pitti Uomo crowd this winter.  I also appreciate a light turtleneck but it confuses me as to why you would want a collar underneath – redundant and uncomfortable in my opinion.

So which is the worst offender of fall 2014/15 – the wet sheep or the double collar?

Let the debate begin…


Essential Steps to the Perfect Pant: Part I

Pants are overlooked.

Their role is a supporting one; the jacket undeniably being the star lead.  Even other supporting characters like shirts and accessories get more attention as easy ways to add a bit of pop to a look.  No more – it’s time for pants to get their due!

Stylistically pants ground and set the tone for an outfit.  They’re also the workhorse – you can undo a jacket or loosen a collar but a pant is always worn at its fullest.  For these reasons a perfect fitting pant is crucial.  This is the first in a three-part series on how to achieve exactly that perfection.

Part I – Get the rise right.

What is the rise?

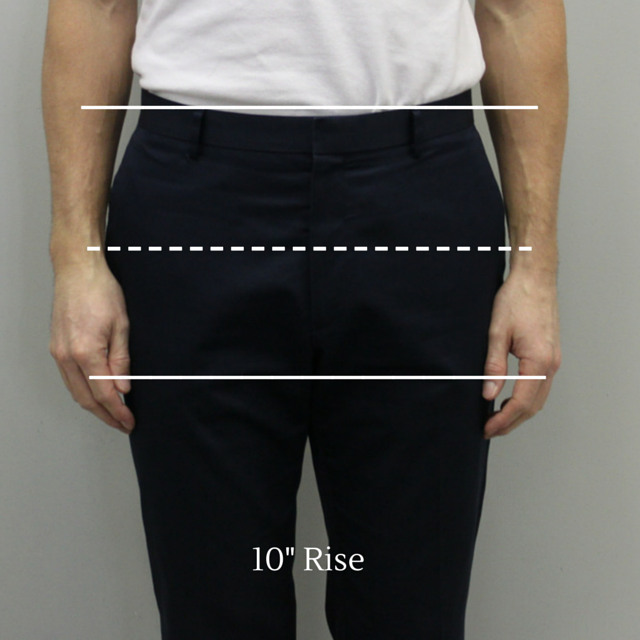
The rise is the distance between the top of the waistband and the bottom of the crotch.  To determine the rise; subtract the length of the in-seam measurement from that of the out-seam. Generally the difference will be between 9-12 inches.

The rise is crucial because it determines where the pants waistband will sit on your body, which in turn creates your perceived waistline.  I say “perceived” because by playing with the rise you are able to alter the proportional relationship between your torso and legs.

inst 5

What is meant by a low or high rise pant?

We’ll use the Navy pant above as our starting point – it’s an example of  a 10 inch rise which is standard for men’s tailoring.  Now imagine cutting horizontally along the dotted line between the waistband and the crotch. With this cut we could hypothetically open it up and add more length; as such the waistband moves up, the bottom of the crotch moves down and the rise gets longer or higher as it’s commonly described.  Conversely we could also remove length to shorten the rise; in this case the waistband moves down, the bottom of the crotch moves up and the rise gets lower.

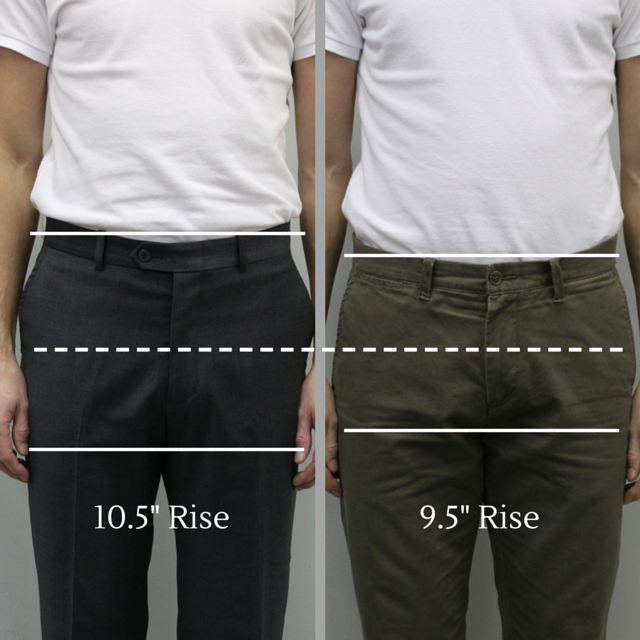
The images below show the results of this process – the Grey pant on the left is a more traditionally cut 10.5 inch rise; the Olive pant on the right being a more contemporary 9.5 inch rise.  As you can see the “perceived” waistline is very different.

ins

Impact of the rise: on style

The three examples shown above clearly show the visual impact that different rise lengths have on the wearers mid-section.  This in turn effects the visual length of the torso and the legs – below are some full body examples to show the influence of this proportional relationship:

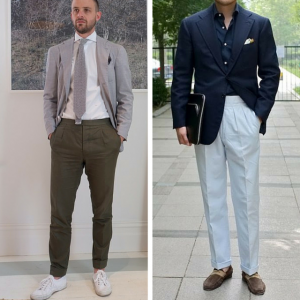
Shorter Rise

 insta re-do2  insta re-do

Right away you should notice the longer appearance of the torso with a shorter rise.  The effect is countered though by the base of the crotch being higher which acts to elongate the legs. These two counter points play off each other to create a very delicate balance – get it wrong and your proportions can start to look very odd.  Those of you with long legs and a shorter torso can go this route without worry.  Everyone else needs to play with this a little to find out what works best for them.

Longer Rise

insta - re-do3  insta7

With this set of images you’ll notice that the torso doesn’t appear a great deal shorter; not at least when compared to the elongation that occurred with the shorter rise.  This is simply because a longer rise mimics the natural shape of our bodies hence less visual manipulation.

What is noticeable is a greater sense of length along the outside of the leg; it’s an effect that is countered though by the base of the crotch being set lower.  The  result is a balanced overall appearance that is applicable to the widest range of body types.  Those of you with a short torso should avoid the longest rises; a medium length will provide the right balance.  Everyone else should be playing with it to find what works best for them.

Impact of the rise: on comfort

Unquestionably a higher sitting pant is more comfortable than one that sits lower on the hips. Our hips are the body’s main pivot point and are in constant motion – when the waistband sits at this point there is nothing it can do but move which in turns causes tugging, pulling and general discomfort.  With the waistband on the natural waist it sits in a place that has very minimal movement hence greater comfort.

That said most of us are willing to sacrifice a little comfort for style in certain situations.  In making this decision it simply comes down to your body type – I’ll use myself as a reference point.  My years in the squat rack have given me the classic “hockey butt” that many of you are familiar with.  Mine is particularly troublesome because I have a very developed upper seat – the result being it pushes the waistband upwards making a lower sitting pant very uncomfortable. As such a higher sitting pant is more comfortable as it allows for more fullness to be introduced into the upper seat area as it is a more gradual increase in circumference from the waistband itself.

So guys with a hockey butts – I’m afraid a shorter rise is likely not your best option from a comfort point of view.  For those of you with flatter or more medium proportioned seats it’s an option that is absolutely open to you.  The key is to try different styles on and get a sense what works for you.  in doing so make sure you walk around the room for a few minutes as opposed to just standing still in front of the mirror – this movement will determine what happens at the waistband and the level of comfort that occurs with it thus guiding your decision making process.

The takeaway:

The proportional relationship between the torso and the legs is a very personal matter.  What looks right to one person may look completely odd to the next.  This post was not about hard rules rather it’s aim was to make you think and look at the choices out there with a new sense of what might work best for your body.  Likely you’ll be like me and enjoy having a few different lengths in your arsenal.

As always let me know if you have any questions or comments – take care.

Michael

info@martinfishertailors.com

Old(er) Man Style…

Some sartorial inspiration to start your week off right. 

insta

Icon

Introducing Yukio Akamine – most known for his iconic days with United Arrows.  This is a fellow who knows exactly what style works for him and he’s versatile enough to do it equally well in the casual sense as well as a slightly more formal.  Well done…

10 Essential Tips: How To Care For A Suit

Suit Care 101 – Ten Essentials:

1.  Dry clean twice a year – once per season.  Never any more.

2.  Spot clean to deal with daily stains.  Take a wet towel and dab at the stain to pull it out of the cloth.  No wiping, no rubbing – only dabbing.  Avoid soaps and chemicals as they can change the color of the cloth – a problem that is usually more unsightly than the original stain itself.

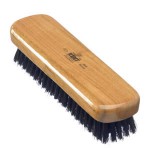
3.  Softly brush the suit before and after each use.  Head to your local cobbler and grab a basic horsehair shoe brush.  Go over every part of the suit – should take no more than two-three minutes.  What you’re doing is brushing away dust and dirt fragments as well as opening up the wool itself to allow it to breath.  With wool being a natural fiber that breath-ability allows the not so pleasant odors to escape and the cloth to physically perk up and look better.

KentTravelClothesBrush

4.  Let it breath – after a days use and the brushing process is complete leave the suit in an open space to let fresh air circulate through it.  The more time we give it the more the odors will disperse.  Conversely if we jam it in the closet the exact opposite will occur.

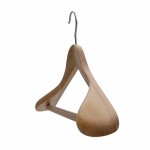
5.  Proper hangers.  The key is to get yourself hangers with at least 2-2½” of width at the end – this is crucial as it helps supports the shoulder area when it’s not in use.  Do not keep it on a skinny plastic hanger as the shoulder will quickly loose its shape and it is very difficult to get that shape back.  For the pants – it’s best to hang them upside down from the bottoms.  The waistband and upper portion of the pant is heavier hence the creases that formed in the day will naturally fall out of the cloth when left upside down.  An easy solution – get to Ikea as they offer serious value at 99 cents per hanger.

1533-Suit-Hanger

6.  Never steam a suit – not even quickly by hanging it on the bathroom door while you shower.  Never – period.  To create the shape of the suit we use both steam and heat to shrink the cloth in some areas while stretching it in others.  Miss-used steam destroys that work and again it’s hard to get the shape back.

7.  Rest – at a minimum you need to give at least a full days rest between uses.  Ultimately you have a few suits in the rotation so you’re able to wear each suit once a week.  If it has to be twice then sticking to these directions is critical in order to maintain and ultimately increase the life span of your suit.

8.  Common sense.  This is dress clothing and you always need to think about that fact.  If you need do a deep knee bend – first slightly pull the fabric up at the knees to reduce strain on the seams above.  When reaching upwards to grab something off a shelf – first unbutton the jacket to again reduce strain on the seams.  When sending your suit for cleaning or pressing – put it in the suit bag to transport it rather than roll it in a ball and throwing it in a laundry bag.  Suits are expensive pieces of clothing and need to be treated as such at every stage to increase their lifespan.

9.  Send it for a pressing.  After doing all of the above there will still come a time when the suit begins to look a touch sloppy.  That is when you take it to a trusted dry cleaner and get the suit lightly pressed.  Repeat – lightly pressed not dry cleaned.  When dropping it off you need to stress it’s to be a light pressing – especially on the lapels.  A light pressing will give life to the cloth and make you appear a bit more crisp and sharp.  Over pressing will simply beat the life out of the cloth and make it shiny.  Roughly every 8-10 weeks will do.

10.  Be aware.  As you’re brushing take stock of how the garment is wearing.  Are there any pulls in the cloth?  Are any of the seams showing signs of strain?  It’s a lot easier to manage little problems in wear and tear as opposed to dealing with full on rips and blowouts.

Don’t hesitate to get in touch if you have any questions – take care.

Michael

info@martinfishertailors.com

Friday Style Debate: Can a textured wool tie work with a smooth worsted suit?

#1c

Time to debate!

This is a classic example of mixing textures – and it’s this critical element that keeps a look visually interesting (and will be the topic of its own blog post in the coming weeks).

In this case a co-worker who I share studio space made the comment that the rough texture of the tie wasn’t harmonious with the smoothness of the suit’s cloth.  I can see his point of view and it got me thinking – is it?

Let the debate begin…

5 Quick Tips For Buying Off The Rack…

Advice For Buying Off The Rack

The key is to know which aspects of a suit you need to get right from the outset and which areas you can tweak via the alterations route.  The idea that alterations can fix all flaws is in itself a flawed way of thinking.  Here are a couple of things to keep in mind:

Get the shoulders right

Both in terms of the width as well as the length over the top of the shoulder.  The width is easy – as you can see in the image below the shoulder seam needs to be sitting in the vicinity of your shoulder bone.  It can be slightly inside for a narrower appearance or slightly outside to give you a wider appearance – this visual manipulation is up to your eye and is based on personal preference.

20140903_141225

The length over the top is not discussed as often but is critical to understand for fit.  Imagine you’re squeezing a ruler under your armpit – the distance up and over the shoulder from one point to the other is the length we’re talking about.  Too tight and the lapels will buckle; too loose and you’ll be swimming in the jacket.  Your eye will see the difference but more importantly you will feel it – we’re looking for your body and the jacket move together in unison. No pulling, restriction or downward pressure on your shoulders/chest area; but equally no floating effect where the jacket moves independently of you.

Of the two – width can be altered.  That said it’s not cheap – removing and reattaching the sleeve is time consuming and getting it done right is crucial as the shoulders expression is so key to a jackets appearance.  If the rest of the jacket is dead on then consider it – if not walk away.  As for the length over the top – it’s not alterable so you got to get that right.

Get the front close

Be wary of the jacket that is “almost right” but has a lot of excess on the front in relation to the back.  This typically happens to guys who have a bigger back in relation to their chest.  The overall circumference of the jacket is right for their size but it’s the location of the fullness that is off.  Sales folk will often tell you that it can be taken in at the back seams to create a cleaner silhouette – sometimes this is the case but don’t always believe them.  No doubt the number one alteration error I see around town is the aggressively taken in back to compensate for fullness on the front.  All too often the result is a front that is still too big but now with a back that is clearly too tight.

Why is this?

It’s because the front of the jacket is pretty much set – the front is unalterable due to the buttonholes while the front seams can’t be changed due to the pockets.  What can be altered on the front though is the chest – we can take out up to ¾” per side without throwing off the fit of the sleeve.  So be careful – if you do have some excess in the back then you can “pull around” the front by removing that excess.  If the pulling around technique gets the front close enough for you to be happy with then go for it – if not then simply walk away.

Be wary of length

linkedin post - insta

There are two versions of this – one can be saved while the other cannot. I’ll start with the save – this occurs when the jacket fits properly but the style is simply longer than you desire.  By this I mean the shoulder and chest fit, the button stance is in the right location as are the lower pockets.  In this case it’s relatively easy to remove length from the bottom of the coat – the only factor to keep in mind is the balance of the coat thus don’t overdo it and remove too much length.  This is a common alteration as a shorter jacket is the fashionable look these days.

In terms of the non-save – this occurs when the jacket is too long in the body for your height.  By this I mean the button stance and lower pockets are sitting too low.  In this case the length needs to be removed from the mid-point of the jacket which is obviously not possible.  I’m afraid simply lopping it off from the bottom will not solve the problem.

Get the rise right

The rise in a pair of pants is crucial – it dictates the look and feel of the pant but more importantly it’s crucial for comfort as well.  Certain body types require specific rises – be it due to your height or your physique.  If the rise and resulting fit isn’t right then walk away and find a different style of pant as it’s unalterable.  Check back next week for a full breakdown on all things pants.

Be specific

If you’re able to avoid and/or navigate some of the situations discussed above then you’re in the position to make a purchase.  At this stage you can get as specific as you want – how specific of course depends on the amount you’re willing to spend on alterations to get things perfect.  Here are the key finishing alterations:

Square shoulders – OTR jackets are cut to accommodate as many body types as possible but where they will miss is if your shoulders are too square.  In this case you’ll have excess cloth bunching up at the base of your neck under the collar – it’s relatively common and easy to deal with.

Clean the chest up – The fit across the chest is crucial for both comfort and the overall silhouette.  A lot of guys elect to go with too much room adding a lot of visual bulk while actually making the jacket more uncomfortable to wear.  As stated above we can take away up to ¾” on either side – it’s relatively common and easy to deal with.

Clean the button stance up – Be it giving a little or taking a little away.  Try not to follow the fashion trends of today and have the button on the verge of popping off due to stress.  Conversely don’t follow the old adage of being able to fit a fist between your belly and the coat itself.  Just measure yourself at the button stance level – the jacket should measure about 3-5” bigger than that number.

Slim the sleeves – A lot of brands are making improvements in this area but not all.  After slimming the chest and button stance nothing destroys the look more than blousy sleeve.  Nobody gains weight in their elbows and forearms so slim it up to sync with the rest of the jacket.  And as a reminder – always show ¼”- ½” of your shirt cuff.

Get the waist and seat right on your pants – Too tight looks bad and feels worse while too loose is just plain sloppy.  The waist should stay in place with no help – the belt being there for decoration only.  As for the seat – you will want about 2” of ease.  That means the pant should measure that much more than your actual measurement – a 40” seat needs a 42” actual measure on the cloth.

Taper the pants – It starts at the upper quad and needs to be smooth and steady through the knee to the hem.  My personal rule on the upper quad measure is that it should be 3-3 ½” more than your actual quad measurement.  Any less and comfort begins to be an issue; any more and you begin to have a lot of cloth below your seat.  To find this out – simply measure across the leg right at the bottom of the crotch level.  If it’s too tight/loose – get your tailor to open up the inside seam and add/take away on the back.  The knee should measure in the 18-20” range with a bottom hem in the 14-16” range.  Add an inch if you’re a bigger guy or you want to be more conservative.  The key here is to play a little – it will take a bit of trial and error to figure out what is right for your body and design sense.

Take care – and as always let me know if you have any questions…

Michael

info@martinfishertailors.com

Friday Style Debate: If you had one color combo for eternity which would it be?

fb fsd

Time to debate!

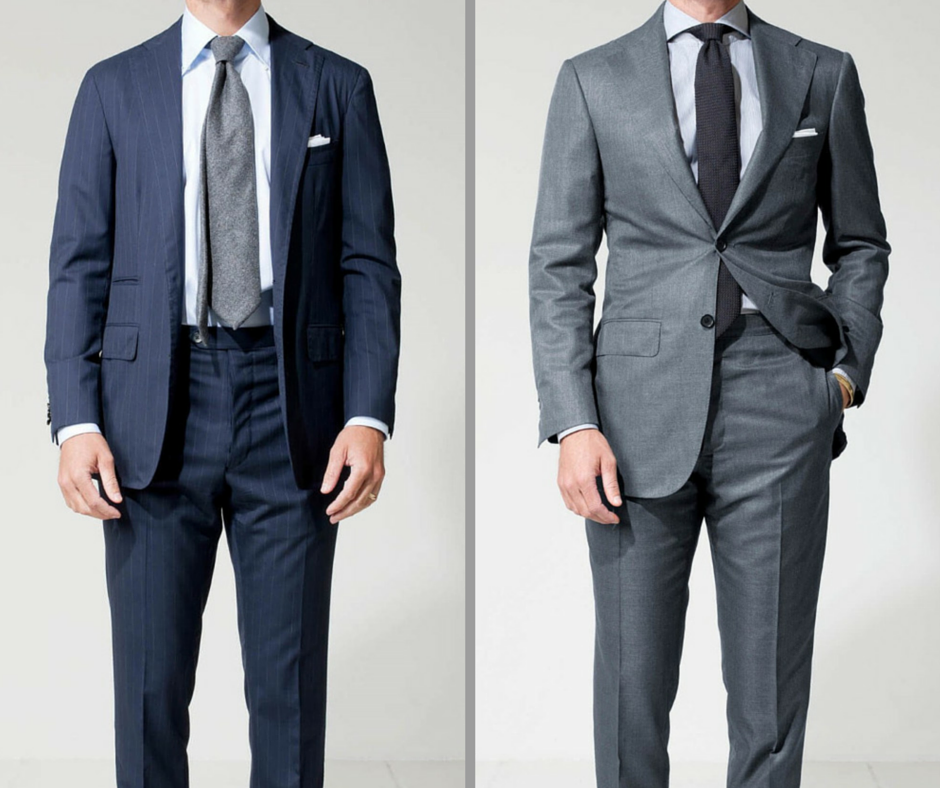
From my perspective these two combinations represent the first two purchases every guy should make.  Versatile in terms of adding other colors plus interchangeable as a way to refresh your look.

Given the choice of only one combination for eternity which would it be?

Let the debate begin…