Category Archives: Tailoring

What is Wednesday #17.

What is Wednesday.

WIW #17

This weekly Wednesday post is aimed at answering some of the more basic and critical aspects of tailoring and the terminology we use to describe them. It stems from realizing that I’m constantly throwing out different terms with my clients and quite often they’re unsure as to what I exactly mean.  The goal of this section then is to alleviate this terminology gap and provide you with some know-how to talk tailoring with a little more ease.

What is…meant by having kissing buttons?

When we say the buttons are “kissing” it simply means they are touching each other.  This can occur in two ways; in the top image below you see the overlapping technique.  This creates different angles to which the buttons lie which to some is visually more interesting.  The second option can be seen in the bottom image; in this case the buttons don’t overlap but instead they are simply abutting one another.

WIW #17 II

This weeks discussion is of course a natural follow up to the relevance of the surgeon’s cuff that was discussed.  In terms of a tie in; both of these methods are possible options when using a surgeon’s cuff or when choosing a cuff that has decorative buttonholes that actually don’t function.  And lastly why would you choose one option over the other?  No reason other than aesthetics – one will simply look better to your eye and that is the one you should go with.

As always please don’t hesitate to get in touch if you have any questions or comments. Better yet book a free appointment and we can banter in person and see if we might be a good fit to work together.

Take care – Michael

info@martinfishertailors.com

Friday Style Debate: Is this the most versatile of coats?

Time to Debate!

FSD - top coats

Friday Style Debate: Is this the most versatile of coats?

For those paying attention we missed two debates while I was away in Paris splitting time on holiday as well as conducting some business.  What quickly became very apparent on the streets of Paris was the prevalence of the top coat on both men and women.  Unstructured, structured, fitted, over-sized, in lighter shades or dark – all of the above were on display.

On the men’s side what was most noticeable was the varied way they were worn; from the traditional manner over a suit, to a dressed down aesthetic with casual clothing and sneakers all the way to pairing them with ‘athleisure’ gear like jogger pants and trainers.  At every level the influence on the over-all look was the same – it added an extra hint of flair that further elevated the guys look.  Which brought me to the conclusion that by far the top coat is the most versatile coat there is.  What other coat can be as comfortable in such a wide variety of styles?

So – what do you think?  Is it the most versatile coat out there or have I overlooked another option?  Let the debate begin…

What is Wednesday #15.

What is Wednesday.

WIW#15 - high armhole

This weekly Wednesday post is aimed at answering some of the more basic and critical aspects of tailoring and the terminology we use to describe them. It stems from realizing that I’m constantly throwing out different terms with my clients and quite often they’re unsure as to what I exactly mean.  The goal of this section then is to alleviate this terminology gap and provide you with some know-how to talk tailoring with a little more ease.

What is…the reason for having high armholes?

The issue of high armholes is perhaps one of the more miss-understood elements of jackets; let it be said once and for all that higher is simply better.  The reasons are the following; it allows you to have a far greater ease of movement, it’s more comfortable and it looks way better as it allows for a trimmer fit in the chest.    The example below shows this quite beautifully:

WIW#15 - high armhole (1)

Ease Of Movement.

Notice how the fellow in the image above has his arm extended to shoulder level.  As you can see there is essentially no lifting, twisting or movement at all in the jacket as a result of this movement.  This is because the sleeve is able to act independently from the body of the jacket due to the higher cut armhole.  Eventually the jacket will start to rise but only as the arm gets above the shoulder level; in the event the armhole was cut lower then the body would be pulled upwards as the arm hits the chest level.

Comfort.

This is primarily due to the fact that the jacket isn’t moving around with each arm or body movement.  This point shouldn’t be underestimated – constant movement of the jacket means constant fidgeting to get things back in place which never looks or feels good.

Cleaner Appearance.

The higher armhole enables the chest to be kept trimmer and cut closer to the body; this takes away a lot of the puddling that we often see right below the armhole which adds unnecessary visual bulk.  Another factor is a longer silhouette from the bottom of the armhole to the bottom of the jacket; this elongates the body and is a big aspect of making a body look longer and leaner which is fairly often a goal of most clients.

As always please don’t hesitate to get in touch if you have any questions or comments. Better yet book a free appointment and we can banter in person and see if we might be a good fit to work together.

Take care – Michael

info@martinfishertailors.com

Friday Style Debate: how do you scarf?

Time to Debate!

scarves - color vs basic

Friday Style Debate: how do you scarf?

With the cold rudely arriving this week it’s definitely time to be breaking out the scarf collection. As I did exactly that it got me thinking as to how others approach what in my view is the ultimate winter accessory.

In my case it goes without saying that I’m a fan of the more muted and subtle approach; I tend to focus more on the richness and depth of muted colors and their texture as opposed to pure boldness.  That said I do marvel every time I visit London in the winter and witness the incredible barrage of color that the English favor in their scarves.  Nothing screams a Mayfair businessman quite like a muted navy suit paired with a dose of color from their socks at the bottom and a scarf from the top!

So – how do you scarf?  Do you lean towards the muted and subtle or do you get pulled to the boldness of color?  Or perhaps you’re someone who likes to dabble on both sides of the sartorial spectrum and keep the rest of us guessing?  Let the debate – or poll in this case – begin…

What is Wednesday #14.

What is Wednesday – sleeve pitch.

WIW #14 - sleeve pitch

This weekly Wednesday post is aimed at answering some of the more basic and critical aspects of tailoring and the terminology we use to describe them. It stems from realizing that I’m constantly throwing out different terms with my clients and quite often they’re unsure as to what I exactly mean.  The goal of this section then is to alleviate this terminology gap and provide you with some know-how to talk tailoring with a little more ease.

What is…sleeve pitch?

The sleeve pitch refers to the angle that the sleeve is attached at the armhole; the chosen position and angle being based on the wearer’s natural arm position.  In the image below we can see the results of perfect sleeve pitch; notice there is absolutely no pulling or twisting in the sleeve as it is smoothly follows the natural arm position of the wearer.

WIW #14 - sleeve pitch II

The good news is that in general the majority of people hold their arms at relatively the same angle as we see above; the shoulders are neutral with the hands resting at ease just behind the hips.  That said there are different postures that influence where the arms are naturally held and thus the angle with which we need to set the sleeve itself.  In the case of an erect posture the shoulders are held back; the result is the arms hang at an angle that finishes closer to the seat. Conversely those who work at computers all day tend to have a forward posture with shoulders rolled the front; the result being the arms are held at an angle that finishes closer to the front of the body.

In essence there are three positions – standard, forward and back.  What occurs is the sleeve is rotated either forwards or backwards to change the angle.  Below is a fantastic animated diagram from Style Forum’s Tailorgod that shows exactly what happens as this rotation occurs.

sleevepitchanimation

In this diagram X refers to the standard neutral position.  Notice the arrow pointing down at the top of the sleeve when it is in the neutral position; this is the base point for the rotation.  In X2 that point is rotated slightly forward; the result being the pitch of the sleeve shifts to an angle that falls back towards the wearer’s seat. Conversely in X3 the top is rotated slightly to the back; the result is of course the opposite as the sleeve falls on a forward pitch that ends closer to the front hips.  Keep in mind these changes are to mimic the wearer’s arm angle and thus achieve a clean line in the sleeve void of any pulling or twisting.

Makes sense?  Again this is a slightly technical post but one that is critical to having a beautifully set sleeve which is one of the key hallmarks to a jacket.  As always please don’t hesitate to get in touch if you have any questions. Better yet book a free appointment and we can banter in person and see if we might be a good fit to work together.

Take care – Michael

info@martinfishertailors.com

Is This The Ultimate Shirt?

the ultimate shirt II (1)

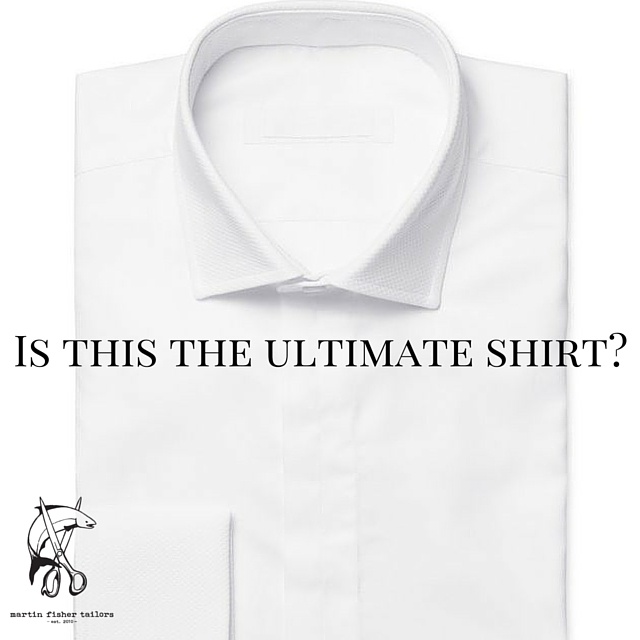
Is this the ultimate shirt?

In my opinion yes it is; and I say that as someone who is yet to even have one in their closet.  I came to this realization last week after going through the design and fitting process with a brand new client.  His request for me was simple; he wanted a clean, minimal design that could be as equally elevated to formal use as it could be reduced to a more casual one.

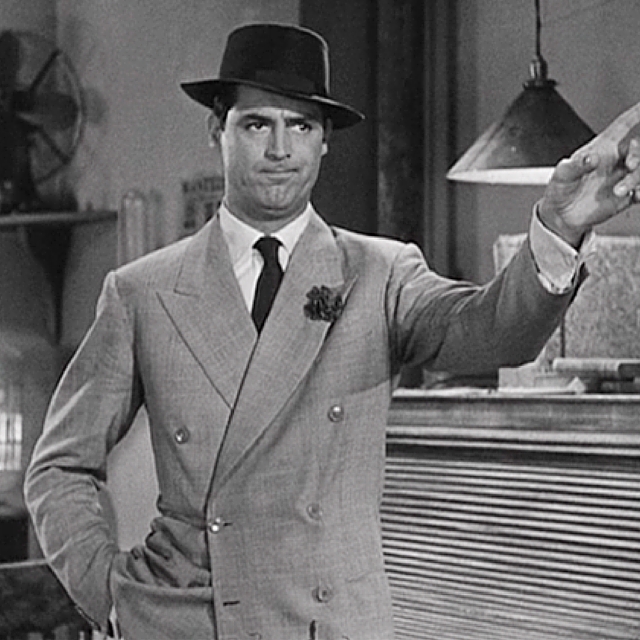
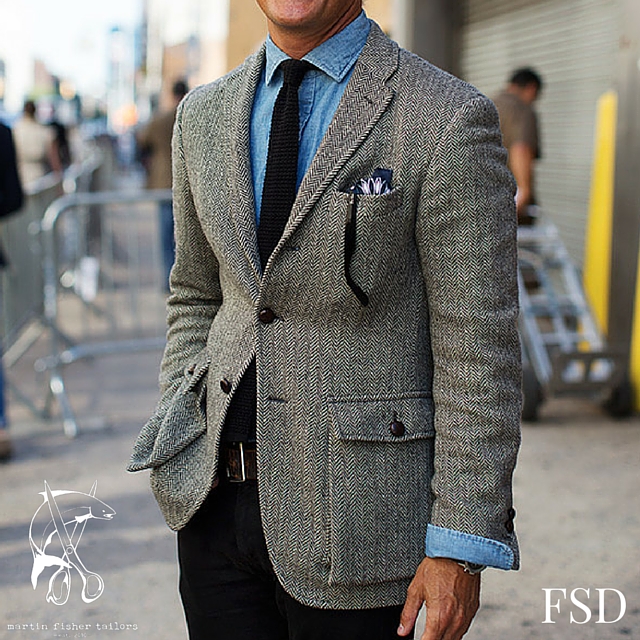
In the end it worked out eerily similar to this guys shirt – timely isn’t it.

blog_edit

Here is how we got there:

Without question the starting point is a crisp white cotton poplin cloth; white obviously being the only color option with the versatility to be both formal and casual.  In our case we chose a strong and lustrous plain weave version from the Tessitura Monti mill of Italy.

From there the discussion moved to the front of the shirt.  Quite often clients like to begin with the collar; in this case though the starting point was down the front.  We did this because “clean and minimal” was the stated DNA of the shirt.  As such we chose to pare down the front as much as possible by covering the buttons with a fly front and electing to forgo the beast pocket.

Ultimate shirt

6 Inch Spread Collar with Covered Buttons Fly Front

The simplicity of the covered buttons provide unquestionable elegance for formal moments; equally it provide a level of visual interest for casual use as a fly front is relatively uncommon. In the end it’s a perfect example of less is more.

Next up was the collar.  The traditional wing tip collar was obviously too formal and my client rightly viewed the pointed style collar as lacking of character when worn tie-less.  In the end we chose a healthy 6 inch spread with a 3 inch tip length – essentially what you see in the image above.  For me this is the perfect middle ground; it works equally well for a bow or long tie, it sits high, open and with tips covered when worn with a sports jacket or sweater and looks clean and contemporary when left on its own.

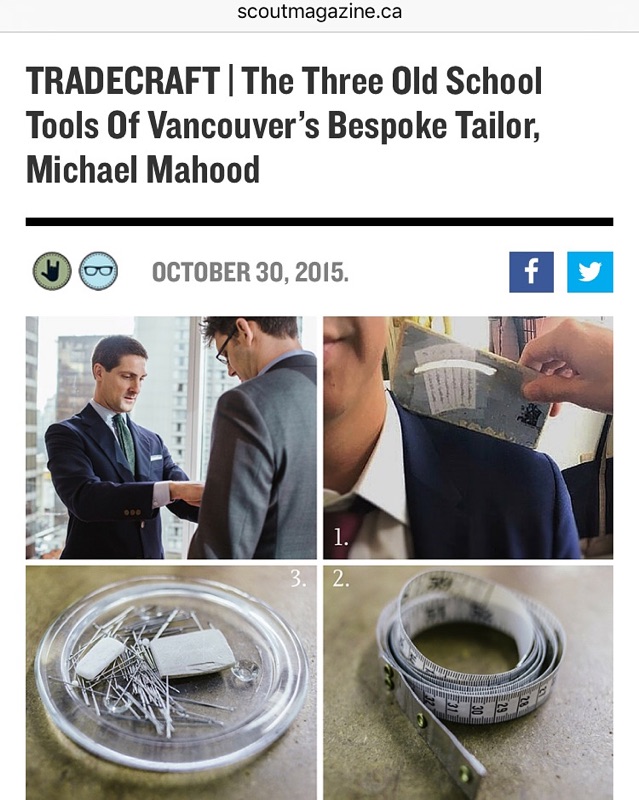
Next up was the cuffs.  Right away the traditional double french cuff was off the table as it cannot be used casually.  In the same vein the standard barrel cuff was out as it lacked the formality needed for certain situations.  The solution – the rarely used single french cuff.  For those of you who are unfamiliar with this style it is a single layer cuff that can be closed formally via cuff links (as Robert Kennedy is showing us below) or casually like a barrel cuff with a button.

cuff styles II

The trick is that there are buttonholes on both sides of the cuff as well as button sewn to the end of the buttonhole on the inside side.  This allows the shirt to be worn to black tie events, in standard business situations as well as casually with sleeves rolled.

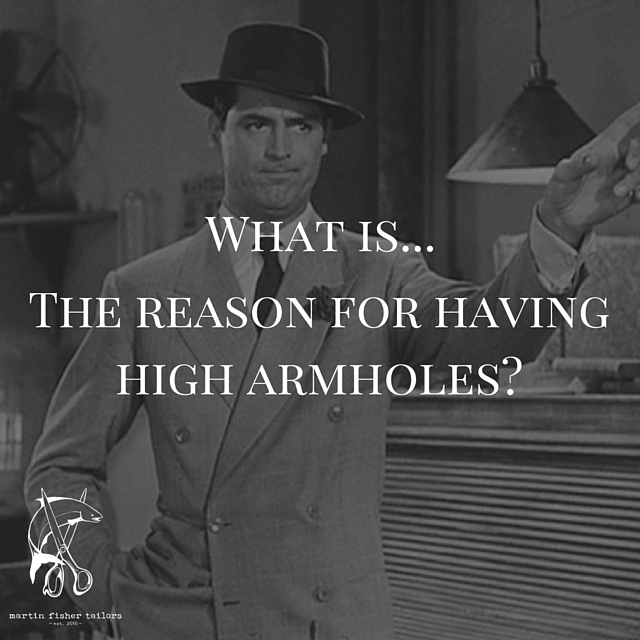
There you have it – a walk through of the design details behind what I now view as the ultimate shirt.  A shirt that is equally comfortable at a black tie event as it is paired with dark denim and a blazer for a casual evening out.  In terms of fit; we decided to cut the armholes high to enable the arms to move freely and independent of the body of the shirt.  This is crucial is it also removes the unnecessary excess cloth that bunches in the armhole area when worn with a trim jacket or a sweater.  We also took the decision to reduce the back panel by 3 inches from the mid back down to the bottom.  This was done so we could avoid putting darts in at the back to create the desired shape.  We took this decision because when using white cloth the darts can often be quite visible; something we wanted to avoid so as to not detract from the overall clean and minimal aesthetic.

When the shirt arrives I’ll be sure to post some images to show you the final product.  Hopefully this was an interesting insight into the design process for some of you who have yet to go through it.  As always please don’t hesitate to get in touch if you have any questions and/or thoughts.  Better yet book a free appointment and we can banter in person and see if we might be a good fit to work together.

Take care – Michael

info@martinfishertailors.com


What is Wednesday #13

What is Wednesday.

WIW #13

This weekly Wednesday post is aimed at answering some of the more basic and critical aspects of tailoring and the terminology we use to describe them. It stems from realizing that I’m constantly throwing out different terms with my clients and quite often they’re unsure as to what I exactly mean.  The goal of this section then is to alleviate this terminology gap and provide you with some know-how to talk tailoring with a little more ease.

What is…the difference between a roped, natural and shirt style sleeve?

In this context what we’re talking about how the sleeve is attached to the body of the jacket – more specifically the treatment that occurs on the most visible area at top of the shoulder. There are many techniques out there but three are predominantly used; roped, natural and shirt style.

Roped Style

I’ll start with roped because it’s the most decorative and easily recognizable of the bunch.  As you can see in the image below there is a very clear height differential between the top of the sleeve and the top of the shoulder.  This is a decorative way to delineate the end of the shoulders and the beginning of the sleeve.  This image is a pretty standard roped sleeve – if the height differential were more prominent we would describe it as being a stronger rope as opposed to a moderate one.  Reasons for choosing this treatment?  One is you simply like the decorative appearance; two is that you might have smaller or sloping shoulders thus you want to visually increase their impact.

WIW #13 II

Natural Style

As North Americans this is by far the most recognizable and popular sleeve style.  It is best described as having a very subtle and soft bump at the point of transition from the shoulder to the sleeve.  It’s important to know that the circumference of the sleeve is actually bigger than the actual armhole; this is done so that the sleeve falls gracefully over the deltoid muscle as opposed to sitting right on top of it and restricting movement.  It is for this reason that there is a subtle bump as it creates that separation (and yes that means the roped style has even more separation) which is then filled with the sleeve head as discussed in What is Wednesday #11.

Shirt Style

The shirt style is the most casual of the three and is more often found on unstructured or very lightly structured jackets.  It’s roots are found in the tailors of Naples and as you can see in the image above the sleeve itself is actually lower than the shoulder.  This is because the seam allowance from sewing the sleeve and the shoulder together is pushed back towards the shoulder of the jacket.  This props the shoulder up ever so slightly in relation to the sleeve which creates a ridge.  You might also notice the slight puckering on the sleeve; this is due to that fact that that as we’ve discussed the sleeve is actually bigger than the armhole. With the first two styles the excess was at the top of the sleeve hence the varying degree in the size of the bump.  As the shirt style sits below the shoulder the excess is in the width of the sleeve as opposed to the height.  The result is the excess fullness gets eased into the armhole and the puckering is the result. Another way to think about it; with the first two styles we go over the deltoid while with the shirt style we go around it.

Make sense?  This one is definitely a touch on the technical side but is critical in helping you wade through the noise that accompanies suit terminology.  As always please don’t hesitate to get in touch if you have any questions. Better yet book a free appointment and we can banter in person and see if we might be a good fit to work together.

Take care – Michael

info@martinfishertailors.com

Tradecraft feature on Scout Magazine…

IMG_0122

I was fortunate enough to be featured in the Tradecraft section of Scout Magazine this past Friday.  It’s always welcome to get a little assistance in the exposure game so head on over and check it out.  For those of you that aren’t familiar with the site do take some time to explore as it’s full of great intel on the food and culture scene in the city – an absolute gem of a resource.

Happy reading…


Friday Style Debate: the thin line of contrived…

Time to debate!

FSD - too Affected- II

Friday Style Debate: the thin line of contrived…

A bit of a conceptual debate this week; all based on my reaction to this image that was posted on The Sartorialist last Friday.   My initial reaction is that he absolutely nails it – here was the quick analysis:

The denim shirt and knit tie are paired perfectly with the heavy wool herringbone jacket – a combination that creates an elevated look but one that is definitely casual in nature due to the less formal materials chosen.  This is coupled with the fact that jacket itself is already on the casual side of the formality scale due to the military inspired cargo pockets on what is otherwise a traditionally designed jacket.  The weathered belt is a great touch while the pocket square softens the entire look.  I even like how the sunglasses are nonchalantly tossed in the breast pocket – it’s practical place for them after all.

But something wasn’t right for me – somehow the overall look felt too polished and slightly affected.  What was throwing me off?  The flipping up of his shirt cuff.

This decision screams out to me that he is actually trying to be stylish and fashionable.  The problem is that to my eye this overpowers all of the other details which he has absolutely nailed.  I loved it when it was all about the subtle details of the cloth and the design but with the flip he crossed the line and became too contrived for me.

Harsh?  Fair?  Somewhere in the middle?  Let the debate begin…