Things To Think About #1 – how you look vs how you feel

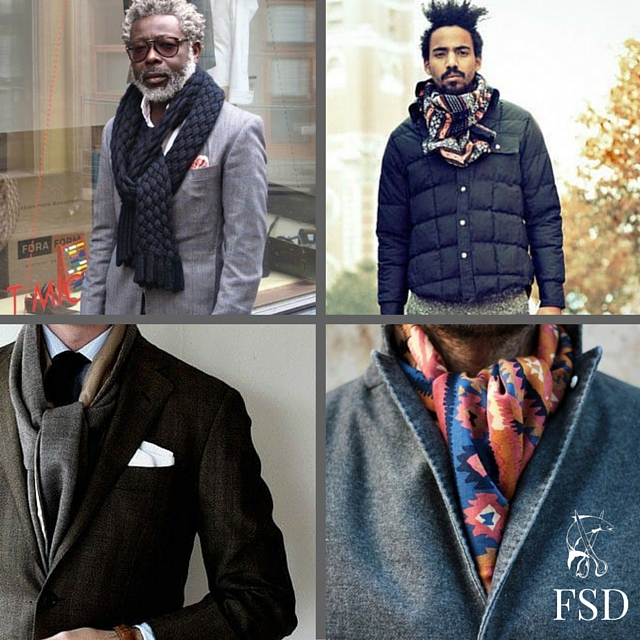
Welcome to the inaugural entry of the “Things To Think About” section.  The idea behind this section is simple; to get you thinking about how certain aspects of tailoring and clothing in general apply specifically to you.  It’s by understanding the subtle nuances of your clothing that you will get the most out of the relationship with your tailor as well allow you to make better decisions when buying ready-to-wear clothing and accessories on your own.

THINK #1

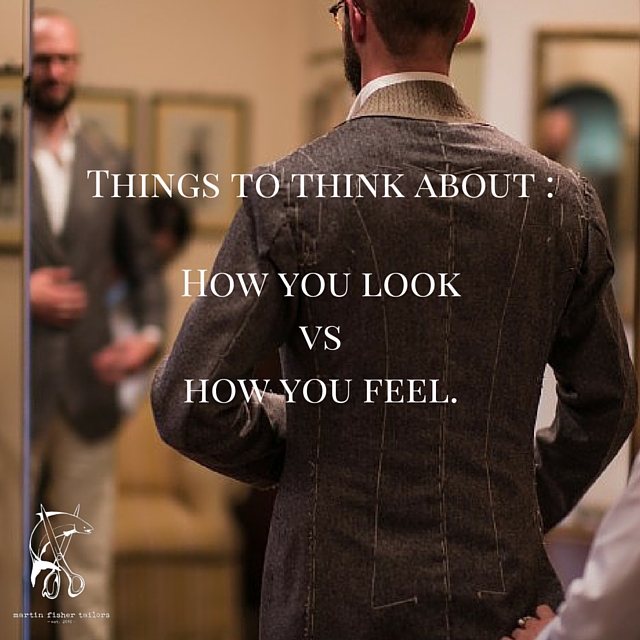
Things To Think About – how you look vs how you feel

I’m starting with what I feel is arguably the most important concept in clothing.  The concept itself is quite simple; how you look in something and how you feel in something are two completely different things.  The goal – whether it’s me working with a client or you building your own wardrobe – is to align these two elements as much as possible; something which is frankly far easier said than done.

What is the difference between how you look and how you feel?

How you look; this is simply what you see when you look in the mirror.  You might like what you see, be on the fence about it or not like it at all.

How you feel; this is what is left when you take the mirror away.  When you’re standing and you look down at your outfit how does it make you feel; you might like it, be on the fence about it or not like it at all.

A key to this conversation – in this context I’m talking about the psychological “feeling” that the clothing is giving the wearer as opposed to the way a garment physically fits and feels in terms of comfort.  The physical element obviously plays a role in this but for the sake of this discussion we’ll only address the visual and psychological aspects of the equation.  I’ll address how the physical relates back in the next post.

THINK #1 a

An Example.

I’ll use myself for this one.  A few months back I found a pant sample in storage that was from 8 years ago; it was in perfect condition though it needed to be slimmed down to become more contemporary in its fit.  I took the opportunity to experiment and slimmed the leg a bit more aggressively than usual – half an inch trimmer in the thigh and knee measurements and a quarter inch less at the bottom.  Nothing too drastic but my thinking was enough to visually create a slimmer silhouette.

The Result

It worked beautifully – when I look at myself in the mirror I see a silhouette that is just hint cleaner than usual and it looks absolutely fantastic.  One would think I hit a home-run but when I look down at myself or when I’m out wearing them I can’t help but “feel” they are too trim and proportionally out of balance with my body.  And to clarify they are not physically too trim (re. tight) as I move freely and comfortably.  I’ve tried to wear them consistently in the hopes that I’ll just get used to this new silhouette – hasn’t worked.  I’ve paired them with different shoe styles (thinner, chunkier, dress shoe, dress boot, loafers, trainers) to find the right balance – hasn’t worked.  I’ve played with their length thinking the amount break would change the feel – nope.  The bottom line is that regardless of how good they look to me in the mirror or how many compliments I receive – they simply don’t feel right.  And with that they sit unused in the closet and will remain there until I decide to loosen them ever so slightly.

THINK #1 b

The Take Away.

Aligning how things look and how thing feel is critical; getting it perfect every time might be asking too much but we’ve got to get pretty darn close as much as possible.  And that is why I’m asking you to think about this stuff – you can’t be passive in this process and hope that alignment naturally occurs.

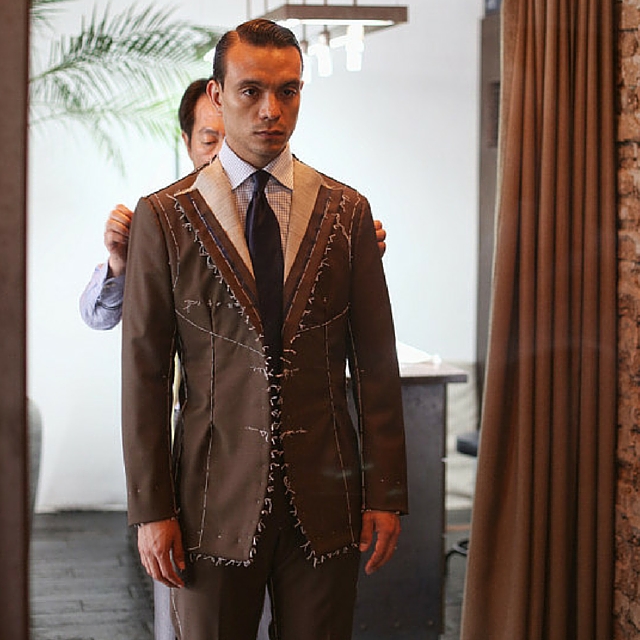
It is for this reason that as a tailor I go through the initial stages of the fitting process without saying anything to the client; I simply analyze the fit, style and how the garment interacts with the body and take notes independently.  Once I complete this process I then ask the client “What do you think?” – notice that I don’t ask “How does that look?” or “How does that feel?” as I want to see which way they go on their own.  More often than not clients return the question by simply saying “What do you think?” – throwing out the old joke “you’re the expert after all!”  That might be the case but it’s irrelevant what I think in that moment; aligning the look and feel can only come from one person and that is why you cannot be passive when it comes to your clothes.

Once I get a sense of how the client is feeling we can then start to makes some decisions together – do we sacrifice a touch of “feeling” for some “look?”  Do we do the opposite?  Perhaps the client want to go trimmer with the knowledge that we can always “loosen things up down the road if things don’t feel right.”   At the end of the day that is one of the reasons why tailoring is so addictive – the ability to make changes is built into the clothes themselves.  This allows for a journey to occur whereby we get clearer with each commission and an individuals sense of style and alignment is truly found.

Let me know what you think about this new section – as always I value your input and would love to hear any suggestions you have about what topics need to be tackled.  Better yet book a free appointment and we can banter in person and see if we might be a good fit to work together.

Take care – Michael

info@martinfishertailors.com

Friday Style Debate: how do you scarf?

Time to Debate!

scarves - color vs basic

Friday Style Debate: how do you scarf?

With the cold rudely arriving this week it’s definitely time to be breaking out the scarf collection. As I did exactly that it got me thinking as to how others approach what in my view is the ultimate winter accessory.

In my case it goes without saying that I’m a fan of the more muted and subtle approach; I tend to focus more on the richness and depth of muted colors and their texture as opposed to pure boldness.  That said I do marvel every time I visit London in the winter and witness the incredible barrage of color that the English favor in their scarves.  Nothing screams a Mayfair businessman quite like a muted navy suit paired with a dose of color from their socks at the bottom and a scarf from the top!

So – how do you scarf?  Do you lean towards the muted and subtle or do you get pulled to the boldness of color?  Or perhaps you’re someone who likes to dabble on both sides of the sartorial spectrum and keep the rest of us guessing?  Let the debate – or poll in this case – begin…

What is Wednesday #14.

What is Wednesday – sleeve pitch.

WIW #14 - sleeve pitch

This weekly Wednesday post is aimed at answering some of the more basic and critical aspects of tailoring and the terminology we use to describe them. It stems from realizing that I’m constantly throwing out different terms with my clients and quite often they’re unsure as to what I exactly mean.  The goal of this section then is to alleviate this terminology gap and provide you with some know-how to talk tailoring with a little more ease.

What is…sleeve pitch?

The sleeve pitch refers to the angle that the sleeve is attached at the armhole; the chosen position and angle being based on the wearer’s natural arm position.  In the image below we can see the results of perfect sleeve pitch; notice there is absolutely no pulling or twisting in the sleeve as it is smoothly follows the natural arm position of the wearer.

WIW #14 - sleeve pitch II

The good news is that in general the majority of people hold their arms at relatively the same angle as we see above; the shoulders are neutral with the hands resting at ease just behind the hips.  That said there are different postures that influence where the arms are naturally held and thus the angle with which we need to set the sleeve itself.  In the case of an erect posture the shoulders are held back; the result is the arms hang at an angle that finishes closer to the seat. Conversely those who work at computers all day tend to have a forward posture with shoulders rolled the front; the result being the arms are held at an angle that finishes closer to the front of the body.

In essence there are three positions – standard, forward and back.  What occurs is the sleeve is rotated either forwards or backwards to change the angle.  Below is a fantastic animated diagram from Style Forum’s Tailorgod that shows exactly what happens as this rotation occurs.

sleevepitchanimation

In this diagram X refers to the standard neutral position.  Notice the arrow pointing down at the top of the sleeve when it is in the neutral position; this is the base point for the rotation.  In X2 that point is rotated slightly forward; the result being the pitch of the sleeve shifts to an angle that falls back towards the wearer’s seat. Conversely in X3 the top is rotated slightly to the back; the result is of course the opposite as the sleeve falls on a forward pitch that ends closer to the front hips.  Keep in mind these changes are to mimic the wearer’s arm angle and thus achieve a clean line in the sleeve void of any pulling or twisting.

Makes sense?  Again this is a slightly technical post but one that is critical to having a beautifully set sleeve which is one of the key hallmarks to a jacket.  As always please don’t hesitate to get in touch if you have any questions. Better yet book a free appointment and we can banter in person and see if we might be a good fit to work together.

Take care – Michael

info@martinfishertailors.com

Is This The Ultimate Shirt?

the ultimate shirt II (1)

Is this the ultimate shirt?

In my opinion yes it is; and I say that as someone who is yet to even have one in their closet.  I came to this realization last week after going through the design and fitting process with a brand new client.  His request for me was simple; he wanted a clean, minimal design that could be as equally elevated to formal use as it could be reduced to a more casual one.

In the end it worked out eerily similar to this guys shirt – timely isn’t it.

blog_edit

Here is how we got there:

Without question the starting point is a crisp white cotton poplin cloth; white obviously being the only color option with the versatility to be both formal and casual.  In our case we chose a strong and lustrous plain weave version from the Tessitura Monti mill of Italy.

From there the discussion moved to the front of the shirt.  Quite often clients like to begin with the collar; in this case though the starting point was down the front.  We did this because “clean and minimal” was the stated DNA of the shirt.  As such we chose to pare down the front as much as possible by covering the buttons with a fly front and electing to forgo the beast pocket.

Ultimate shirt

6 Inch Spread Collar with Covered Buttons Fly Front

The simplicity of the covered buttons provide unquestionable elegance for formal moments; equally it provide a level of visual interest for casual use as a fly front is relatively uncommon. In the end it’s a perfect example of less is more.

Next up was the collar.  The traditional wing tip collar was obviously too formal and my client rightly viewed the pointed style collar as lacking of character when worn tie-less.  In the end we chose a healthy 6 inch spread with a 3 inch tip length – essentially what you see in the image above.  For me this is the perfect middle ground; it works equally well for a bow or long tie, it sits high, open and with tips covered when worn with a sports jacket or sweater and looks clean and contemporary when left on its own.

Next up was the cuffs.  Right away the traditional double french cuff was off the table as it cannot be used casually.  In the same vein the standard barrel cuff was out as it lacked the formality needed for certain situations.  The solution – the rarely used single french cuff.  For those of you who are unfamiliar with this style it is a single layer cuff that can be closed formally via cuff links (as Robert Kennedy is showing us below) or casually like a barrel cuff with a button.

cuff styles II

The trick is that there are buttonholes on both sides of the cuff as well as button sewn to the end of the buttonhole on the inside side.  This allows the shirt to be worn to black tie events, in standard business situations as well as casually with sleeves rolled.

There you have it – a walk through of the design details behind what I now view as the ultimate shirt.  A shirt that is equally comfortable at a black tie event as it is paired with dark denim and a blazer for a casual evening out.  In terms of fit; we decided to cut the armholes high to enable the arms to move freely and independent of the body of the shirt.  This is crucial is it also removes the unnecessary excess cloth that bunches in the armhole area when worn with a trim jacket or a sweater.  We also took the decision to reduce the back panel by 3 inches from the mid back down to the bottom.  This was done so we could avoid putting darts in at the back to create the desired shape.  We took this decision because when using white cloth the darts can often be quite visible; something we wanted to avoid so as to not detract from the overall clean and minimal aesthetic.

When the shirt arrives I’ll be sure to post some images to show you the final product.  Hopefully this was an interesting insight into the design process for some of you who have yet to go through it.  As always please don’t hesitate to get in touch if you have any questions and/or thoughts.  Better yet book a free appointment and we can banter in person and see if we might be a good fit to work together.

Take care – Michael

info@martinfishertailors.com


Friday Style Debate: is this the future of men’s tailoring?

Time to debate!

FSD - layers

Friday Style Debate: is this the future of men’s tailoring?

Are NBA superstar Russell Westbrook (middle) and the NYC design duo of Maxwell Osborne (right) and Dao-Yi Chow changing the future of men’s tailoring right before our eyes?  Before you dismiss the notion think back a decade ago to the arrival of Thom Browne on the fashion scene with his school-boy inspired shrunken jackets and cropped trousers.  Many laughed it off at the time as “fashion” but ten years on and we’re still seeing slim silhouettes all thanks to him.

Which brings us to what we’re seeing today; an emergence of gender neutral silhouettes – both trim and flowing – that play with balance and proportion by combining oversized layers in varying lengths and widths.  It’s being described as tailored sportwear at this point and you have to wonder if it will gain enough momentum to alter the traditional tailoring game in much same way that Thom Brown did a decade ago.

So what do you think – are we seeing the future of men’s tailoring shift before our eyes?  Let the debate begin…


What is Wednesday #13

What is Wednesday.

WIW #13

This weekly Wednesday post is aimed at answering some of the more basic and critical aspects of tailoring and the terminology we use to describe them. It stems from realizing that I’m constantly throwing out different terms with my clients and quite often they’re unsure as to what I exactly mean.  The goal of this section then is to alleviate this terminology gap and provide you with some know-how to talk tailoring with a little more ease.

What is…the difference between a roped, natural and shirt style sleeve?

In this context what we’re talking about how the sleeve is attached to the body of the jacket – more specifically the treatment that occurs on the most visible area at top of the shoulder. There are many techniques out there but three are predominantly used; roped, natural and shirt style.

Roped Style

I’ll start with roped because it’s the most decorative and easily recognizable of the bunch.  As you can see in the image below there is a very clear height differential between the top of the sleeve and the top of the shoulder.  This is a decorative way to delineate the end of the shoulders and the beginning of the sleeve.  This image is a pretty standard roped sleeve – if the height differential were more prominent we would describe it as being a stronger rope as opposed to a moderate one.  Reasons for choosing this treatment?  One is you simply like the decorative appearance; two is that you might have smaller or sloping shoulders thus you want to visually increase their impact.

WIW #13 II

Natural Style

As North Americans this is by far the most recognizable and popular sleeve style.  It is best described as having a very subtle and soft bump at the point of transition from the shoulder to the sleeve.  It’s important to know that the circumference of the sleeve is actually bigger than the actual armhole; this is done so that the sleeve falls gracefully over the deltoid muscle as opposed to sitting right on top of it and restricting movement.  It is for this reason that there is a subtle bump as it creates that separation (and yes that means the roped style has even more separation) which is then filled with the sleeve head as discussed in What is Wednesday #11.

Shirt Style

The shirt style is the most casual of the three and is more often found on unstructured or very lightly structured jackets.  It’s roots are found in the tailors of Naples and as you can see in the image above the sleeve itself is actually lower than the shoulder.  This is because the seam allowance from sewing the sleeve and the shoulder together is pushed back towards the shoulder of the jacket.  This props the shoulder up ever so slightly in relation to the sleeve which creates a ridge.  You might also notice the slight puckering on the sleeve; this is due to that fact that that as we’ve discussed the sleeve is actually bigger than the armhole. With the first two styles the excess was at the top of the sleeve hence the varying degree in the size of the bump.  As the shirt style sits below the shoulder the excess is in the width of the sleeve as opposed to the height.  The result is the excess fullness gets eased into the armhole and the puckering is the result. Another way to think about it; with the first two styles we go over the deltoid while with the shirt style we go around it.

Make sense?  This one is definitely a touch on the technical side but is critical in helping you wade through the noise that accompanies suit terminology.  As always please don’t hesitate to get in touch if you have any questions. Better yet book a free appointment and we can banter in person and see if we might be a good fit to work together.

Take care – Michael

info@martinfishertailors.com

Tradecraft feature on Scout Magazine…

IMG_0122

I was fortunate enough to be featured in the Tradecraft section of Scout Magazine this past Friday.  It’s always welcome to get a little assistance in the exposure game so head on over and check it out.  For those of you that aren’t familiar with the site do take some time to explore as it’s full of great intel on the food and culture scene in the city – an absolute gem of a resource.

Happy reading…


Friday Style Debate: the thin line of contrived…

Time to debate!

FSD - too Affected- II

Friday Style Debate: the thin line of contrived…

A bit of a conceptual debate this week; all based on my reaction to this image that was posted on The Sartorialist last Friday.   My initial reaction is that he absolutely nails it – here was the quick analysis:

The denim shirt and knit tie are paired perfectly with the heavy wool herringbone jacket – a combination that creates an elevated look but one that is definitely casual in nature due to the less formal materials chosen.  This is coupled with the fact that jacket itself is already on the casual side of the formality scale due to the military inspired cargo pockets on what is otherwise a traditionally designed jacket.  The weathered belt is a great touch while the pocket square softens the entire look.  I even like how the sunglasses are nonchalantly tossed in the breast pocket – it’s practical place for them after all.

But something wasn’t right for me – somehow the overall look felt too polished and slightly affected.  What was throwing me off?  The flipping up of his shirt cuff.

This decision screams out to me that he is actually trying to be stylish and fashionable.  The problem is that to my eye this overpowers all of the other details which he has absolutely nailed.  I loved it when it was all about the subtle details of the cloth and the design but with the flip he crossed the line and became too contrived for me.

Harsh?  Fair?  Somewhere in the middle?  Let the debate begin…

What is Wednesday #12

What is Wednesday.

WIW #12

This weekly Wednesday post is aimed at answering some of the more basic and critical aspects of tailoring and the terminology we use to describe them. It stems from realizing that I’m constantly throwing out different terms with my clients and quite often they’re unsure as to what I exactly mean.  The goal of this section then is to alleviate this terminology gap and provide you with some know-how to talk tailoring with a little more ease.

What is…a shoulder pad and why do we use them?

Typically made of canvas, felt and/or polyester fleece – shoulder pads are shaped roughly like a half moon and extend from the shoulder seam back over the shoulder itself.  They’re intended to create an even shape over the shoulder to allow the jacket to have a perfect platform from which to hang over the chest and back.  Throughout time they’ve come in a variety of shapes and sizes – from the bigger styles of the 80’s to the smaller version we generally see today.

The top image we see below is an example of roughly the middle ground.  Double the the thickness of the white felt in the middle and we’re getting into Gordon Gekko territory and the power suit of the 80’s.  Reduce the felt just just thinnest of layers and now you have a sense of what today’s lightly padded jacket contain.

WIW #12 II

In terms of the why; the Greek God Ares shows us how the shoulder area is anything but uniform.  In fact it’s much like a mountainous region – there are peaks and valleys and no two are the same.  Some have a lot of muscle and are round in shape, others are bony and angular, while others yet are mix of both.  And this is where the pad comes in – its role is to smooth over these variations and establish and even shape from which the jacket’s shoulders will sit.

Lastly a note on size; generally less is more.  The style of the moment is all about reducing padding and having the shoulders appear as natural as possible.  This is especially important for muscular guys as there is no need to come across looking like an NFL linebacker.

As always please don’t hesitate to get in touch if you have any questions. Better yet book a free appointment and we can banter in person and see if we might be a good fit to work together.

Take care – Michael

info@martinfishertailors.com

The Absolute Basics: 5 Keys To Suit Care

Whether you’re new to wearing suits or you’re a veteran of the game it’s always good to get a refresher on the keys to caring for your suits.  These are the absolute basics and will keep your suits both looking crisp and in the best condition possible for a longer life.  For a few other tips have a quick look at this earlier journal post from last year.

The Absolute Basics- 5 Keys To Suit Care

The Absolute Basics: 5 Keys To Suit Care

1.  Proper Hangers

This one is easy – it’s just a matter of making it a priority and getting it done.  Dress clothing is expensive and an investment thus you need to treat them exactly as such.  Two hangers are needed:

A) Jacket Hanger

Two keys here; firstly the width at the end of the hanger needs to be substantial coming in at a minimum of 2″ in width.  This is necessary to support the shoulders of the jacket and enable the roundness of a perfect shoulder to be maintained.  The second key is the actual length of the entire hanger; it needs to be long enough that the ends are supporting the shoulders but not too long whereby they push past the shoulder seam and distort how the sleeves fall.

1534-Dark-Wooden-Hangers

B) Pant Hanger

Always folded along the center crease to maintain a crisp appearance and always hung upside down from the pant bottoms.  Gravity combined with the fact that the waist band is heavier means the legs of the pants will be taut and hence the wrinkles and creases from daily wear will fall out of the pant.

41iwCdI3frL._SY355_

2.  Space

Giving your clothes room to breath is crucial – both right after use and in how they are stored. Nothing is worse than after a long day of use you cram your suit back into a tight closet for the days wrinkles and smells to remain firmly in place.

Instead begin by letting your clothes hang out in the open for awhile – ultimately by a window – and let air circulate around them.  This will allow any heat and moisture from your body to dissipate and with it the associated smells.  When it’s time to put them away the key is to again have some room to let them breath – a rough rule being to have one inch on either side enabling the garment to hang freely.  Pay particular attention to jacket lapels – they get easily distorted and miss-shapen when pressed up against the back of another jacket.

3.  Spot Clean

Any time you get a stain or spill something make sure you spot clean.  Simply take a damp hand towel and carefully dab at the foreign substance.  Be sure to avoid wiping and pushing the substance deeper into the cloth; rather use a twist and lift motion so as to ‘pull’ it out of the garment and into the hand towel.  When done make sure you allow the area to completely dry and then lightly brush any remaining excess off.

Crucial – only after going through this process and it failing to lift the substance do you consider going to a dry cleaner to deal with a stain.  The chemicals used in the dry cleaning process are very harsh and as such we should only dry clean our dress clothing 1-2 times a year at most.

4.  Brushing

The ultimate goal should be to brush down your suits after every use; reality though means this is unlikely thus let’s settle on every second wear.  Brushing is crucial as it gets rid of the surface dust and grime that accumulates on the cloth in daily use.  Failing to do so means over time the natural pores of the wool fibers become clogged and filled with these particles resulting in a lifeless and often dingy smelling cloth.

PROMOTION_DCM-HowTo9X-TRICKS

How?  Go to any shoe store or cobbler and get yourself a five inch shoe brush with soft bristles made of hoarse hair.  Lightly brush the coat after each use; start at the shoulders and work your way along the collar and down the lapels.  Next look after the body of the coat before completing the process with the sleeves.  As you do this you will visually see the cloth ‘perking’ up as the fibers are opened, cleaned and given room to breath.  Think of it as the clothing equivalent of washing your face!  As for the pants it’s much the same though pay particular attention to the seat and pant bottoms; it’s amazing what we sit on in a day and the amount of splatter that comes up off the ground as we walk.

horn-clothes-brush__88989_zoom

5.  Awareness

As you go through all of the above steps make sure to take a look at your clothes and keep tabs on their general wear and tear.  Check under the arms and crotch area to see how the cloth is standing up to the inevitable rubbing, check on the stitches of the seat and across your blades for signs of stress, make sure all the threads of your buttons are firm and not starting to fray, etc.  Being on top of the little things means we can address them before the become full blown problems and are much more difficult to deal with.

I hope this quick list helps – and inspires – you to take a touch more care with your clothing.  As I stated at the beginning a wardrobe takes time, effort and funds to build thus maintenance and care are crucial for longevity.   As always please don’t hesitate to get in touch if you have any questions.  Better yet book a free appointment and we can banter in person and see if we might be a good fit to work together.

Take care – Michael

info@martinfishertailors.com